Thursday, August 6, 2015

Introducing Sight Words

http://rvclassroom.blogspot.com/2015/08/introducing-sight-words.html


Initially, I thought about titling this post, "Introducing Sight Words to Toddlers," but honestly the age of the child doesn't really matter. I taught sight words to kindergarteners and second graders as well as many struggling readers up through fifth grade, but if I were working with an illiterate adult, I'd do it the same way. The main reason for this is because the process is universal, but the application is tailored to meet the needs of whom ever you are working with. That might be hard to understand at this point, but keep reading... You'll see what I mean in a minute.

Many people are worried about what order the words should be introduced. Different boxed curriculums introduce sight words in different orders. If you choose to follow a box curriculum, then it is best to follow the order prescribed by that curriculum. Before buying it, I suggest looking through the list of sight words in the order they are introduced. In the beginning of the list, you want to see words that are not only simple to read because they have few letters, but also the words that are the most frequently used words. (Words like:  I, a, go, you, see) In addition to that, look through the first 5 words and ask yourself, "Can I make a sentence with these words?" Reading a simple sentence like, "I see you" and building onto it like, "I see you go" can help a child realize that they can read early on in the process. I know that sounds silly. Here you are teaching your child words and you expect them to automatically think they are learning to read, but from my experience, especially when working with struggling learners, THEY DON'T. They need proof that they can read. Being able to read simple words is not enough, they need to be about to read sentences, find the words in books, and put the sentences together to make stories early on. Usually after you celebrate your student when they finally put all the words they know together to read a simple book or two, they look at you with big eyes as if the light bulb finally comes on... "Oh! I can read!" Seriously, this is the best moment about teaching reading!

You don't have to use a box curriculum to teach sight words, although it does come in handy if you don't feel confident about what you're doing. For teachers that do feel confident with their abilities to know their students reading skills and make appropriate decisions, not having a box curriculum to follow can be liberating! Allowing your child's environment to determine what sight words are introduced first, because they come up in real words situations is the most effective way for children to learn. In fact, don't let a box curriculum halt you from introducing a sight word that comes up naturally. If your child notices the word STOP while you're walking around the block, take a minute and talk about it. Add it to your flashcard stack of words your child practices. Your student will learn it quickly because he or she has a visual representation to draw from. Then, when that word comes up in the order of the curriculum they can breeze right through it feeling highly successful!

As I just mentioned, I made sight words for my students. In fact when I taught kindergarten and second grade each of my 24 + students had their own stack of sight words to learn. Some had two or three if they were just beginning to read while others may had 40 or more. That might sound mind boggling, but over the years, I got quite organized on how to do that and I share with you how you can do it too. Check out Kindergarten Reading Folder: Sight Word Log, but don't let the word kindergarten scare you away no matter what age your child is. You can also find how I organize teaching letters HERE and numbers HERE! Or click the pictures below!

https://www.teacherspayteachers.com/Product/Kindergarten-Math-Folder-Number-Log-0-20-860169https://www.teacherspayteachers.com/Product/Kindergarten-Reading-Folder-Letter-Log-Names-Sounds-and-Handwriting-866361https://www.teacherspayteachers.com/Product/Kindergarten-Reading-Folder-Sight-Word-Log-All-220-Dolch-Sight-Words-907180
        
 These flashcards are multi-purpose. First, you play games with your student to practice reading the sight words. Then, you use them as an assessment tool to make sure you are not moving forward too fast or too slow for the student. 

Whether your student is 2 or 200 years old, he or she is going to be more interested in learning to read if it is fun. Games are a great way to teach your student to read words. Check out a previous post I wrote listing some games I've played with my students to learn sight words HERE. Sure, any game will work, but if you take into consideration your child's interests, they will be more engaged in the learning and you know what that means... 

1. They'll have more motivation to keep going once they've made a mistake. 

2. They'll want to spend more time playing (shhhhh... learning)!

3. They'll think learning the words is fun, not work.

All of this adds up to learning the words faster and remembering the words better!

For example, my son (age 4) loves is obsessed with trains! In the picture below, we're playing a game called Rocks on the Tracks. Note how easy this is... Setting up games does NOT have to take tons of time and fancy materials. I tossed his sight word flashcards down on the floor face down in a circle from the beginning of his train to the end of his train. Each time he got to a rock (flashcard), he picked it up and read the word on it, which allowed him to move the rock (to me). He enjoyed this so much that he wanted to give each of his engines a turn to go first riding around the track removing rocks. 


Another important part of practicing the words is making up sentences with them. Remember, this is what turns the light bulb on for them to see they really do know how to read.

1. You can put words in the order of a sentence for your student to read.

2. You can tell your student a sentence and have him or her find the words and put them in order. 

Last, is the assessment piece. Again, the products above help organize this so it's easy to see when a student is ready for new sight words and when they need to slow down and review (play more games) with what they already have. Some children are capable of learning 4 - 5 sight words at a time while others need to learn them one at a time. If the child proves he or she has mastered all previous sight words, obviously he or she is ready to add to his or her word list. I never add new sight words for a child that has missed two or more words. For struggling readers, all sight words must be mastered before I introduce a new one. These students need to continue practicing the words they have even if the box curriculum says it is time to move on. If this is the case, repeat a previous lesson, play a game, work on sentences, but do NOT move forward just because the curriculum says this is the next lesson to teach. 

Best wishes on your sight word teaching experiences! Let me know how things are working for you. If you have any further questions about helping your student, just ask in the comments below and I will be happy to help you! Also, if you have any fun games you've played, feel free to share your ideas or a link to a blog post below! This is a community with a collaborative spirit where we can help and learn from each other! 

God Bless Your Learning Journey ~


Wednesday, July 1, 2015

Paper Clip Learning Activities

Who doesn't have paper clips lying around? 

I mean really! They are the easiest, most convenient, handy learning manipulatives you can find. They're fun because they come in a multitude of different sizes, colors, and styles. I even have some that are striped! Not to mention, they're quite easy to clean up as long as you have a magnet close by! What more could you ask for?

In this post, I'm going to share some fun learning activities you can do with your children to strengthen a multitude of learning skills.

rvclassroom.blogspot.com/2015/07/paper-clip-learning-activities.html


Here's a list of fun learning activities to do with Paper Clips!

1. Science Experiments with Magnets!
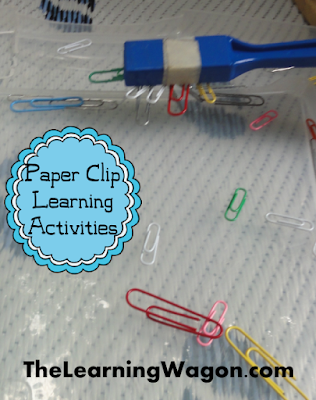
Children love to use the magnet bar to pick up paper clips over and over again! In fact, we used the magnet bars to pick up some of the magnets that were spread out on a large plastic bin lid before using those that stuck to complete other activities such as counting, sorting, and graphing.

Another way to experiment with magnets and paper clips is to place a few large paper clips on to of a flat large plastic bin lid that is raised off the ground (or table). You can do this by putting a couple of bricks or books under each side. Then, have your child stick their hand under the lid with the magnet bar to try to move the clips around. The bumps and ridges provide learning challenges. Can they get the paper clip back up when it falls down into a hole? Can they move the paper clip around a bump?


 2. One-to-One Correspondance
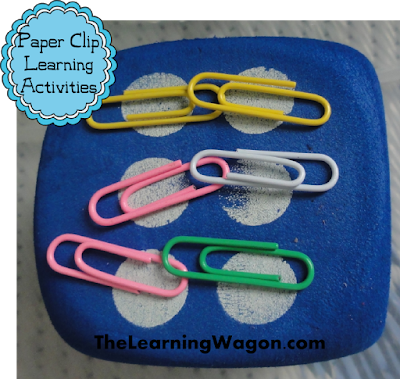
Have your child roll a large dice. Then, using small paper clips, have your child match up one paper clip to each dot on the dice.
 
rvclassroom.blogspot.com/2015/07/paper-clip-learning-activities.html
3. Counting
We call this game going fishing! The magnet is the fishing pole and the paper clips are the fish. All the fish are in a lake (a large plastic bin lid). The children hold their magnet over the lake to see how many fish they can catch in one spot. I didn't let my children touch the lake or fish with their rod, they had to hold it over. One reason I made this rule was because it was fun to see. The other reason is because it cut down on the number of fish caught making them more manageable for my four year old to count (9 - 14 fish instead of 30 fish) as they threw the fish back into the lake.

rvclassroom.blogspot.com/2015/07/paper-clip-learning-activities.html

4. Sorting by Color
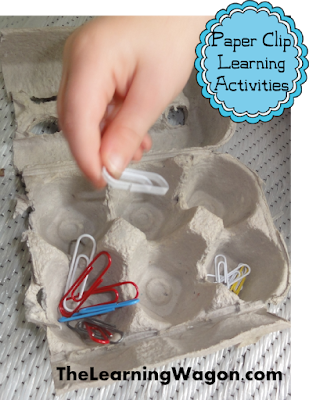
Again, we used the magnets to collect the paper clips before sorting them into a egg carton, but you could just provide a bag of various colored paper clips for your child to sort them. The magnet is just a novelty that makes it more fun!

rvclassroom.blogspot.com/2015/07/paper-clip-learning-activities.html

5. Sorting by Size
This was done is a similar fashion as sorting by color.

rvclassroom.blogspot.com/2015/07/paper-clip-learning-activities.html

6. Fine Motor Skills
Working with paper clips in general is a great way to build fine motor skills and strengthen finger muscles. Pulling paper clips off the magnet bars, picking up paper clips from a flat surface. linking paper clips together and all skills that require precision from the thumb and forefinger.

****

That's all the activities that we actually did in our learning journey so far, but I have additional ideas for the future when Caleb and Lily Anne are ready for more complex skills.

****

7. Patterning
Using various size or colored paper clips, have your child create papers. Patterns can also be created by placing the paper clips a certain direction (horizontal, vertical, or diagonal). Encourage your child to be creative in their pattern creations!

8. Addition
Provide your child with paper clips of two colors (red and blue) Have your child use the magnet bar to collect paper clips. Then, your child can pull the paper clips off and sort them into their two colors. I would provide a large construction paper where I draw and circle for the first color set (blue), a plus sign, another circle for the second color set (red), and an equal sign. If you laminate the construction paper, your child can use a dry erase marker to write what the two sets add up to. 

9. Subtraction
Provide your child with a bag of paper clips all the same color and a bag of number cards. I would also create a mat from construction paper similar to the one above, but with a minus sign instead of a plus sign. Have your child select a number card and place it above the first circle on the mat. Then, have them count out that many paper clips and put them inside the circle. Have your child select another number to place above the second circle. Have your child take away that many paper clips from the first circle and move them to the second circle. Then, the paper clips that are left should be moved to the left side of the equal sign, counted and the number should be written. Allow your child to experiment with taking away from different numbers. Don't tell your child that he can't take 5 paper clips away from 3, let them figure it out through their experiment as well as discussion as to what they are doing and why they don't think they can do that.


****

Really the learning possibilities are endless with paper clips. Teaching fractions, multiplication, and division would be just as fun!

God Bless Your Learning Journey~


Monday, June 29, 2015

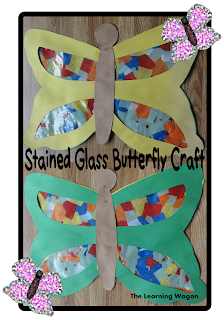
Stained Glass Butterfly Craft

It's time to share a craft. My kids love butterflies and I'm sure yours do too! Who doesn't? We chase them, observe them on flowers, draw them, paint them, and today we crafted a beautiful butterfly together.


http://rvclassroom.blogspot.com/2015/06/stained-glass-butterfly-craft.html


Supplies you'll need...

1. Construction Paper - You'll need 2 sheets of 9" X 12" construction paper to make the butterfly. Your children my choose the same color or two different colors. Caleb's favorite color is green, so he chooses green for everything and yellow is one of the colors Lily's good at identifying, so those were the colors they chose. You'll also need a sheet of brown paper to make the head and body of the butterfly.

2. Scissors

3. Glue

4. Scotch Tape 

5. Shipping Tape

6. Cut Tissue Paper Squares


How to put it together...

1. Place the two sheets of colored construction paper on top of each other and fold them in half at the same time. Use your scissors to cut out wings on one side of the butterfly so that when it opens, you will have symmetrical left and right side wings. While folded, cut out decorative shapes on the butterfly, but the shapes must be no bigger/thicker than the shipping tape. I cut out lines across the top and bottom of the butterfly, but you may cut out small circles, hearts, or any other shape of your choosing.

2. Fold the brown construction paper in half and cut out the shape of the butterfly's body and head so that you end up with two pieces.

3. Tear a strip of shipping tape that is about a foot long. Fold back the ends of the tape and place them on a table in front of your child so that the sticky side faces up.
http://rvclassroom.blogspot.com/2015/06/stained-glass-butterfly-craft.html 

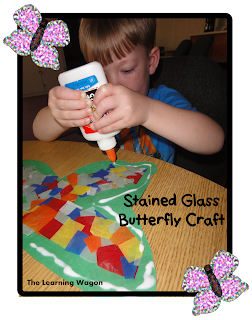
4. Provide your child with cut tissue squares. Older children and strengthen finger muscles by tearing their own tissue squares. Have them children fill the sticky side of the shipping tape with colored tissue paper so that little to no stickiness remains. 

5. Pull off another strip of shipping tape equal in size to the first and cover the tissue paper so that it has a laminated affect.

6. Cut the laminated tissue paper strip to match the designs you created in the butterfly. Have your child secure the laminated strip down using Scotch tape. 

http://rvclassroom.blogspot.com/2015/06/stained-glass-butterfly-craft.html


7. Have your child place glue all around the construction paper edge. There should be no glue placed on the laminated tissue paper areas.


http://rvclassroom.blogspot.com/2015/06/stained-glass-butterfly-craft.html


8. Match up the second construction paper butterfly on top of the glue. 

9. Have your child draw a straight line down the middle of the butterfly using glue. Attach the head and body of the butterfly to this area.

10. Flip the butterfly over and have your child place another straight line of glue down the middle of the butterfly plus the head and bottom of the butterfly from the other side. Match up the second head and body on top of this area. Then, let dry.


http://rvclassroom.blogspot.com/2015/06/stained-glass-butterfly-craft.html


11. Hang up for a beautiful affect on a window!

Enjoy!

God Bless Your Learning Journey,

http://rvclassroom.blogspot.com/2015/06/stained-glass-butterfly-craft.html


Sunday, May 31, 2015

From the heart

I'm going to get back in the writing action again. I had to take some time off to focus on my family and then to be honest it was just hard to get back into the groove. If you follow me on Facebook, you probably saw the posts about my sister having a brain bleed before Christmas, my husband had a bilateral hernia surgery in January, one of my former students went home to be with the Lord, among dealing with various colds and stomach bugs all while traveling around the country. I'm not complaining though. I am thanking you for your prayers for my family. My sister is blessed to be healed, my husband is blessed to be healed and functioning like a normal person again, we are healthy for the moment and while it is a tragic loss that I am still grieving over, I know and am comforted that my sweet student is with Jesus today dawned in a brand new and perfect body. 

Tragedy can easily pull us into a downward and chaotic spiral if we let it. It's much easier to ride the wave in that direction, but I thank God for inspirational people he places in my life to jump off the wave and fight the currant to find hope for a better tomorrow, a different perspective, and God's will for my life again. One of these amazing people is Kristy. We met on the 2014 Chicken Whisperer Tour that took up through Indianapolis, Indiana where my husband rented the Chicken Limousine for a night on the town with four winners from his fan base. Kristi was one of them. I say her mom battles from ALS, because she has been diagnosed with it, but Kristi battles every minute of the pain and struggles this horrible disease causes right along with her all while being a wonderful mother, wife, and doing a job she is passionate about. She hangs up family pictures in her mothers room for her to look at and smile, she is her mom's advocate when her mother has to be admitted to the hospital, and she does everything she possibly can to make sure her mom is comfortable and has what she needs. She is an amazing daughter!

I also met a woman named Susan on this same ride. She suffers daily from Lyme disease, but she doesn't let it stop her. She battles her own disease all while working to educate others about Lyme disease. She traveled out of her way just to come see us when we came back to Indiana this past month on the 2015 Chicken Whisperer tour. Even though her disease was taking a toll on her body, she joined us at our campsite after the event to chat and play around with my kids on the playground. She's an inspiring person to know!

My student that passed away was named Abram. He was born with a heart defect and had many surgeries even before he showed up at my kindergarten classroom door. He instantly had my heart and his parents were and are just as lovely. Even thinking of the loss of this child right now brings tears to my eyes so much so that I have had to stop and busy myself with other things between writing the sentences in this paragraph just so I don't completely break down. I have two children of my own and thinking for a moment about how I would feel if I lost one of them is not something I can fathom. Holding myself together through a beautiful sermon, people sharing wonderful experiences about my child, a slide show of his short life, and family and friends gathering in a line to offer words of blessing and comfort just doesn't seem possible. Tracey and Leonard somehow raised a son that was sweet, compassionate, brave, strong, faithful, hardworking, empathetic, caring, and always smiling a feat that is amazing in itself, but they are also trusting God with his plan, a plan we don't understand. They are strong and amazing people. I could see the comfort and peace that only God can provide at a time like this in Tracey and Leonard when I shared my love for them and Abram at the funeral. They are a truly inspiring couple.

God has blessed us while traveling to meet so many people, wonderful people that have a special place in our hearts. We all have our moments of negativity, but don't let them pull you down. I'm saying this to myself as much as to anyone that reads this. This wasn't my intended post for today, it's just what came from my heart, so I feel it is what God has led me to write for what ever reason. If you heart is spiraling toward depression because of the trials that you have experienced, take a moment to look at the lives of others around you. Not to say, well at least my life isn't that bad, but to be inspired to live a joyous life through whatever trials you may experience.

God bless your learning journey ~


Monday, December 8, 2014

On The Road Again: Florida Bound 2014


After a few delays, we left the homestead on Tuesday, November 18th and headed up to Horseshoe Trails in the North Georgia Mountains. It's located close to Pop, Andy's dad, so we got to enjoy family time for a few days with him and even cooked a small Thanksgiving dinner to enjoy together.

From there, we headed a little further south to Cumming, GA where many of my family live. We enjoyed spending time with each other. I especially enjoyed relaxing in the hot tub, just me and my sister. I also got to see my Mom and Dad's new house.

We are truly blessed to have our family and be with them. We had a great time with everyone and didn't want to leave, but at the same time we were itching to get to our destination in Florida to begin our winter of warmth and fun! Georgia was quite cold on Thanksgiving week. We headed out Saturday, November 29th and had planned to drive half way and finish the trip the following day, but once we got in the truck and got going we were on a mission!


Ten and a half hours later, at a respectable time of 8:30pm (not too late for putting the kids to bed), we arrived and were so excited. First thing, we took a walk around the park to stretch our legs, get the kids some exercise and visit some of our old friends we had met last year!


We've been here for about a week now, but it feels like we never left. We got our setup completed (for the most part) and we jumped right into our pattern from last year of playing games, water aerobics, riding our bikes together, and visiting the local Children's Museum for Tot Time on Tuesday. We're excited that there's a new family here this year with 2 girls ages 7 and 8 and a little boy that's 4 years old. The girls have adopted Lily and our boys are having fun together being boys!

We also bought a Christmas Tree and had a great time decorating it together!


God Bless your Learning Journey - 


Related Posts Plugin for WordPress, Blogger...