Showing posts with label activities. Show all posts

Tuesday, December 15, 2015

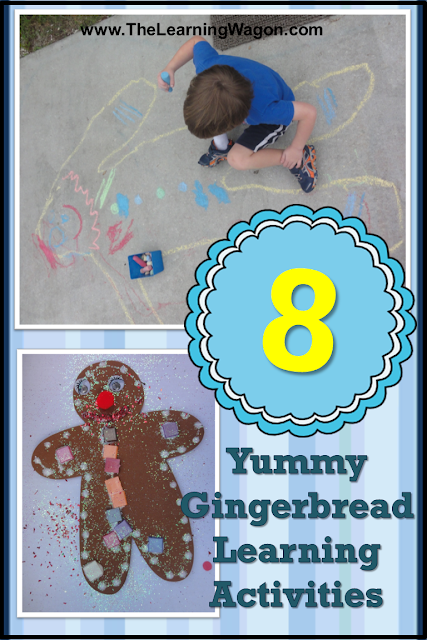
8 Yummy Gingerbread Learning Activities


Isn’t the month of December a fun time to learn? The range of themes to choose from this time of year is numerous! You could focus on cultures with a “Christmas around the World,” theme or select a broad theme like “Winter”. I like to narrow down my theme each week. The themes I have planned for December are Christmas Trees, Snow, Gingerbread, The Nativity, and we have a Polar Express Day coming up soon.

This week’s theme is Gingerbread, so I thought I would share a few activities that we have been doing this week.
http://rvclassroom.blogspot.com/2015/12/8-yummy-gingerbread-learning-activities.html

Gingerbread Activities:

1. Read Books
There are so many fun Gingerbread themed books out there, it’s impossible to read them all in a week (unless that’s all you did!). It would be fun trying, but there are so many fun activities you can do with the books that it’s good to take a break from reading occasionally. Our first book to read was The Gingerbread Man, by Karen Schmidt. 

2. Life-size Gingerbread Man Decorating
After reading the book, we used our vocabulary to describe what the gingerbread man looked like. Then, we took turns lying down on the patio to get traced with outside chalk, which made a life-sized gingerbread man. Then, we used the chalk to decorate our giant gingerbread man and girls. 

http://rvclassroom.blogspot.com/2015/12/8-yummy-gingerbread-learning-activities.html

3. How Many Gingerbread Men Tall are You?
I have foam gingerbread men that I got from a dollar store a couple of years ago. We used them as our measuring units to see how tall we were. First, Caleb laid down and Lily Anne placed the foam shapes from his feet to his head. He was 7 gingerbread men tall.  Then, we measured Lily Anne. She was 5 gingerbread men tall. We talked about how Caleb was taller and that meant it took more gingerbread men to measure him. We looked at the two measurement columns of gingerbread men we created to see that some of Lily’s matched up to Caleb’s, but Caleb had 2 extra or 2 more gingerbread men than Lily did. 

4. How Tall and How Wide is Your Gingerbread Man?
After measuring ourselves with gingerbread men, it was time to measure the foam cookies themselves. I provided pennies, small paperclips, large paperclips, and square plastic jewels that they used to measure the height of the gingerbread man. Then, we used those same items to measure the width of the gingerbread man. We talked about the following math vocabulary words: height, tall, width, wide, measure. We also compared the outcomes of our measurements using each material and talked about why the outcomes were different. 

http://rvclassroom.blogspot.com/2015/12/8-yummy-gingerbread-learning-activities.html

5. Roll and Splat Gingerbread Man Numbers
Next, we rolled giant dice and counted the number of dots on the dice. Then, the kids splatted BINGO dabbers on those numbers. This was a fast and fun activity!

http://rvclassroom.blogspot.com/2015/12/8-yummy-gingerbread-learning-activities.html

6. Play Dough Gingerbread Man Decorating
We decorated gingerbread men several different ways today. During our sensory time, we decorated play dough gingerbread men. The kids used cookie cutters to cut their gingerbread man out of brown dough. Then, they used beads, wiggle eyes, plastic jewels, cut pieces of sparkly pipe cleaner and other items to decorate and redecorate!

7. Foam Gingerbread Man Decorating
We also decorated those foam gingerbread men that we used to measure earlier in the day. I provided the children with a variety of materials and let their creativity go crazy. It was a good time to practice our gluing skills too.

http://rvclassroom.blogspot.com/2015/12/8-yummy-gingerbread-learning-activities.html

8. Gingerbread Journaling
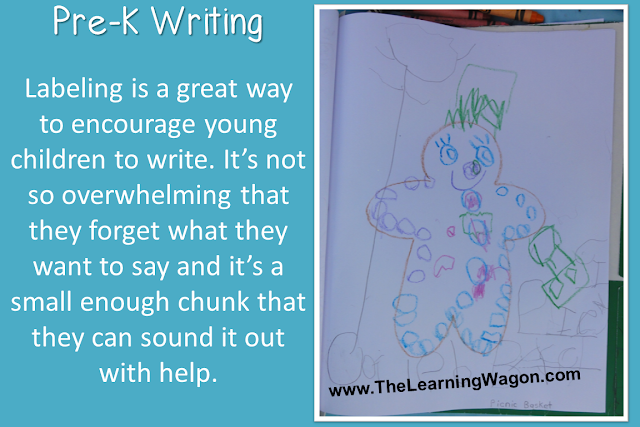
The last gingerbread man decorating activity we did was when they transferred how they decorated their foam gingerbread man to their journal. Even though I tried to encourage them to draw what they saw, (For example, if the gingerbread man had red buttons, the child should draw red circles on his gingerbread man) I didn’t want to stifle their creativity and I’m glad I didn’t. Caleb surprised me by drawing a picnic basket in the gingerbread man’s hand. We talked about how the gingerbread man was going on a picnic and what he was going to bring. Would it surprise you to know gingerbread men bring cookies on their picnic?  After finishing his drawing, he decided he wanted to write the words “picnic basket” on his paper. We said the words together and determined that there were two words, so I drew 2 lines. Hind-sight 20/20, I should have drawn the lines longer. He stills writes his letters very large, but we squished them in. He impressed me with his letter knowledge. I helped sound out the words and he listened and wrote the sounds he heard. 

http://rvclassroom.blogspot.com/2015/12/8-yummy-gingerbread-learning-activities.html

http://rvclassroom.blogspot.com/2015/12/8-yummy-gingerbread-learning-activities.html


I found several of these activities and more on Pinterest. You can find more Gingerbread themed learning activities by visiting and following my Gingerbread Board!

Are you having fun with a gingerbread theme? Feel free to share what you do with others in the comments below or find me on Facebook or Twitter! I always love to hear from my readers!

God Bless You on Your Learning Journey ~

http://www.thelearningwagon.com/


You can find me at these great Link Ups!

Tuesday, October 27, 2015

More Halloween Matching

I think I’m on a Matching Activity Roll! It’s something we enjoy and these games are really easy to make... usually… at least this one is! 

 http://rvclassroom.blogspot.com/2015/10/more-halloween-matching.html 

This one is Halloween themed, but we also did a letter and number version that I’ll be sharing later. You’ll also want to check out the Halloween themed MemoryMatching game I shared earlier.

http://rvclassroom.blogspot.com/2015/10/more-halloween-matching.html


All you need for this activity is…
* Some foam shapes (mine were stickers, but they don’t have to be)
* A file folder
* A pen
* A zip bag

I chose to use foam shapes for this activity because they are easier to trace, but you can use plain stickers if you choose. If you have foam shapes that aren’t stickers, that will work too. Since the foam won’t stick to the page, this game could be revisited without making more cards.

The cards are made from a file folder. I cut it in half length wise. Depending on your child’s age and abilities, she may be able to match many shapes using the whole file folder or she may need to just do a few using a quarter of the file folder. It’s up to you on what size to create.

I used a pen to trace each shape on the file folder card. Then, placed the shape directly in a zip bag so I knew for sure I had a matching foam sticker for each shape I drew. When finished. I added a few extra shapes in the bag for a couple of reasons.
        1. In case any stickers were harmed in the pulling off of the paper backing experience.
        2. Just to make the experience a little more challenging. If you have a child that doesn’t need the extra challenge, just keep a few extras aside in case they are needed.

The last step is to give your child the bag, card, and a little guidance. Then, let the fun begin!

Have a great time learning this fall!


God Bless Your Learning Journey ~


Where I've Linked Up:
Chaotic Bliss Homeschoolinghttp://timewarpwife.com/titus-2sday-link-up-party-42/The Felicity Jar


Wednesday, October 21, 2015

Halloween Matching & Memory


The game of Memory is as old as rocks (well maybe not that old, but close). Even still, it is just as fun for today’s kids as it was all those many years ago.

We made our own Halloween themed version with a sheet of foam and some Halloween foam shape stickers. It was easier than saying, “Trick-or-Treat!”

First, I selected foam shapes that I wanted to use for this project, making sure I had two of each shape so a matching pair could be found. Then, I cut the foam sheet into strips that were wide enough to easily fit the largest foam sticker. After measuring again (you know the old saying, “measure twice, cut once.”), I cut the strips into squares. Last, I placed a sticker in the center of each foam square. And… TADA! I was done!


While Memory is a fun game for a pre-schooler, a toddler may not be quite ready for the structure. Instead, we just played a Matching game (another “as old as rocks” game). For the Matching game, we place all the cards on the table face up. After one is selected, the goal is to find the matching shape.

Have a great time learning this fall!

God Bless Your Learning Journey ~


Linky Parties I've connected with...
The Felicity Jarhttps://www.busyboysbrigade.com/learning-from-each-other-blog-party-7/


Mom's Morning Coffee

Tuesday, October 20, 2015

Sparkling Spider Web


Halloween’s just not Halloween without spider webs. We had fun making these sparkling ones!


Materials:
White foam sheet
Silver Christmas tinsel
White glue
Spider foam shape stickers
Hole punch
Pipe cleaner


Directions:
1. Cut the foam sheet into a square.

2. Use white glue to make a tinsel-X in the middle of the square.

3. Then, place 2 more tinsel strips in an intersecting way through the middle of the X to make a cross.

4. Then, place a tinsel strip on the outside sides of the square.
* This was the limit to my children’s attention span, so that’s where we stopped.

5. (Optional) Cut shorter sections of tinsel and glue them in an octagon pattern around the web.

6. Allow your child to select one or more spiders to stick to the web.

7. Hole punch one of the corners of the white foam square.

8. Stick the pipe cleaner through the hole and twist it to create a circle.


You can hang the completed product on a door handle or cabinet door. You may even choose to hang it on a hook to decorate your front door! Enjoy!

Have a great time crafting this fall!

God Bless Your Learning Journey ~


Linky Parties I've connected with...
Chaotic Bliss HomeschoolingThe Felicity Jarhttps://www.busyboysbrigade.com/learning-from-each-other-blog-party-7/


Mom's Morning Coffee

Wednesday, September 9, 2015

Learning Beads


http://rvclassroom.blogspot.com/2015/09/learning-beads.html


This is a little activity we’ve been playing for a while. Each time we play, we add more to the learning experience! When we first started playing, it was for the purpose of building finger muscles and hand-eye coordination, but as now we practice skills like recognizing colors, patterning, sorting by color, counting, graphing, estimating, comparing numbers, and more. The great thing about this activity is that there are few materials needed and it is quick and easy set-up!


Materials:


Multi-Colored Beads – I used Pony Beads that were pink, yellow, orange, blue, white, and green.

Wooden Kabob Sticks – You will want to make sure the wooden sticks will fit through the hole of the beads that you use.

Play Dough – You will need the same color play dough as the beads that you choose to use if you are working on colors.

Plate/Bowl – The plate/bowl will keep the beads from rolling around and onto the floor while your students are working on this activity.


http://rvclassroom.blogspot.com/2015/09/learning-beads.html


Directions:

(Fine Motor Skills)
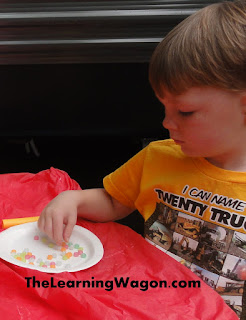
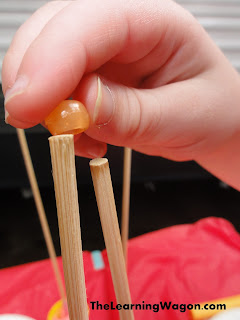
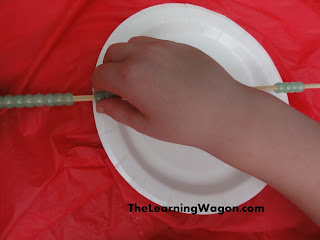
Provide each student with beads in a plate or bowl. Stick the pointy side of a kabob sticks down into play dough while still in the container. Students pick beads from their plate or bowl and push them down onto the kabob stick, but not to far as to push them into the play dough.

http://rvclassroom.blogspot.com/2015/09/learning-beads.html


(Color Recognition and Patterning)
Students place beads on the kabob stick to create a pattern based on the colors of the beads. Have students name the colors and identify the name of their pattern.

(Color Recognition and Sorting)
For this activity, you will need play dough colors that match your bead choice colors. Line the play dough containers up and place one kabob stick in each. Students should name the color of the bead they choose from their plate or bowl and place it on the stick found in the matching play dough color.

http://rvclassroom.blogspot.com/2015/09/learning-beads.html


(Graphing, Estimating, Comparing Numbers)
This activity continues on from the Color Recognition and Sorting activity found above. Once all the beads have been placed on the appropriate sticks, have students look at the beads in bar-graph-like fashion. Have them determine which bead color they have the most of and the least of. Have students make a guess to determine how many beads they have in each color.

(Counting and Comparing Numbers)
Once all the beads have been sorted by color, you can have students count how many beads are stacked for each color. Caleb counted two different ways. First, he tried counting just by starting at the bottom and pointing to each bead as he counted up the stick. When that proved difficult, we laid the play dough container on its side so Caleb could slide the beads one at a time to the right like an abacus. We didn’t need to, but if there was a problem with beads sliding off the top, you could stick another container of play dough on the opposite end. Once we count all the sets of bead colors, we line them up from the smallest about to the largest about. We talk about which colors equaled and what that means when we’re organizing them in order.


If you love these activities and would like a resource to help encourage your students to transfer their understandings from what they’ve learned to paper check out my product: Learning Beads (Counting & Cardinality).


I hope you are inspired to bring some fun to your learning activities by reading my blog. I enjoy sharing my ideas with you. I know teaching can feel overwhelming at times, especially if you look at Pinterest for all your ideas, so I like to share ideas on how to make learning fun and purposeful without a lot of preparation. 

God Bless Your Learning Journey!


Related Posts Plugin for WordPress, Blogger...