
If
you haven’t read it already, you’re going to want to check out my previous
post, What is Roadschooling?

We
love roadschooling, but it wasn’t something we woke up one day and decided to
do. Although some families have, that just wasn’t how we got started. Each
family has a different story and this is ours…
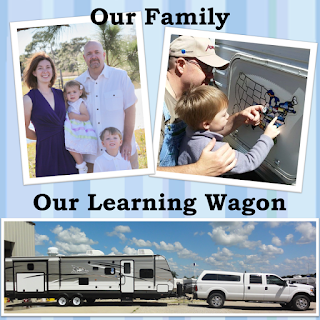
Why We Roadschool...
My
husband is known as the Chicken Whisperer. It wasn’t a planned career for him,
it just sort of happened as a result of our love for raising chickens in our
suburban backyard hobby farm. Once one media station did a story on him, more
and more came knocking on our door and his celebrity status was born. He now
has a radio podcast, book, magazine, is a spokesperson for the USDA, and the
list goes on. I’m really proud of him and all that he’s accomplished.
For
about six years, his sponsors have sent him around the country on tours to
teach workshops. Initially, we hotel hopped, but once our first child was born,
moving from one hotel to the next on a daily basis became cumbersome to say the
least. As we drove down the road during one tour, I began pointing out every RV
that passed by saying, “We need one of those” or “It would be nice to have one
of those” and “Just think how nice it would be to pack everything one time and
head out!”
He
got the message (smart man!)
We
bought our first travel trailer in 2012. It was the biggest RV we could tow
with the SUV vehicle we already had and we were proud to pay cash for it. Once
we got the travel trailer, after Andy’s Chicken Whisperer tours, we would take
side trips just for fun. We’ve always enjoyed traveling and having the RV made
things a lot easier, even when our second child was born! In fact, we took off
on another adventure just 13 days after she was born!
Andy’s
work usually takes up two seasons, spring and fall. Often, we schedule time to
take in the world around us in the various states we visit on his tours, but we
have also bought into some resort memberships, so we can stay in various areas
just for fun at discounted rates. We found ourselves spending more and more
time on the road and less and less time at home, which is why our house is now
on the market. In 2014, we upgraded our tow vehicle so we could purchase a
larger camper, which we just did 3 months ago.
What does our roadschool look
like?
We
do most of our traveling on the Chicken Whisperer Tours. Once we finalize where
we will be and when, I go to work searching for great experiences we can
provide our children. Our kids are 2 and 4 years old, so I choose places for us
to visit that are appropriate for their ages and feel they can benefit from
academically, socially, and physically.
Some
of our favorites include visiting the Statue of Liberty, taking a tour of a
cave in West Virginia, riding trains (even riding in the engine!), and taking a
trolley to the top of Cadillac Mountain in Maine… just to name a few. We’ve
also hit dozens of aquariums, zoos, farms, and children’s museums. We’ve
visited various beaches and enjoyed a few historical sites like when we went to
St. Augustine, Florida; Williamsburg, Virginia; and Stone Mountain, Georgia. In
addition, I check out RV, city, and county parks for their playgrounds or
hiking trails as well as indoor play areas… gotta focus on the gross muscle
learning too!

We
aren’t always traveling though and I wouldn’t want to be. We find those two
seasons of travel enough. Although the summer is spent in various places, you
can often find us at Stone Mountain Park or in the North Georgia mountains
spending time with family and friends. We’ve gotten in a routine of spending
the winter in Lake Placid, Florida, which is where we are now.
What our roadschooling set-up
looks like…
Two
years ago, I wrote a post to describe our roadschooling set-up while we were in
our old camper and honestly even though we have more room in this camper, not
much has changed.
1.
I still organize many of my materials outside the camper in plastic bins with
drawers under a six foot table. To keep the materials safe from the elements, I
use two table cloths. The first table cloth goes on over the table like normal,
but I slide the second table cloth forward so that it drops down over the
lowest drawer. Then, I use table cloth clips to secure it to the table on the
sides and back. I clip the table cloth at the bottom to the drawers underneath
with metal clips to keep it from flapping in the wind. This year, I placed our
mat under the bins to limit mud splatter on the bins when it rains. While I’ve
never had any of the contents of the bin get wet even when it flooded about 3
inches of water around our camper at one park, there was a lot of dirt and mud
around the outside. The water would have to get higher than the top of the
lowest bin to get inside and damage the contents. That said, I store paper
products, books, and electrical materials inside the camper. As you can see,
most of my outside bins contain craft supplies, play dough, and holiday
decorations.

2.
In this blue bin, I keep bubble toys, water play toys, sand play toys, kitchen
cooking toys, toys for ball play and other outside learning equipment.

3.
While there are books in the kids’ room, I store additional books for various
seasons and holidays under our bed so I can rotate them out. That way, they
stay more interesting.

4.
I keep paper products, teacher books, Cindy Cupp readers, dry erase boards, and
pocket charts in a cabinet in the kids’ room.

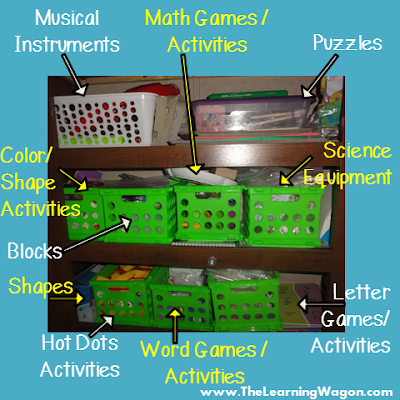
5.
I keep puzzles, music equipment, and science materials behind the fold down
table in the kids’ room. There are also various reading and math learning games
and activities in these fun green crates.
6.
Now that we have more room, I have posted a sight word wall area. I used 3M
hooks to hang these colorful pocket charts that we can post letters or sight
words on. It makes it easy to refer to when writing in our journals, easy game
set-up, and easy to grab and go when I want to use them in other ways!

Obviously,
this is our set-up when we are stationary. When we are traveling frequently
from city to city, all the inside materials stay the same, but we don’t set-up
the table, mat, and all the bins… Too much work! Instead, I remove what I
really want from the bins that are under the table and make room for them
inside the camper. The tables and bins are stored in the back of our truck, so
they’re still accessible, but not as easily.
Right
now we still have a house, which is storing all of my teaching materials. When
we sell the house, most likely we will purchase a storage unit because I am
just NOT willing to downsize my collection of children’s books that number in
the thousands, or well really ANY of my teaching resources. I’ve already gone
through it all once and that was painful enough. The only thing that made me
feel better was that I was giving it to a good teacher friend. Therefore, as we
travel, we occasional stop by the house and switch out books, themed materials,
etc. You don’t know how much it pains me to buy a binder when I know I have 15 in the closest! Okay, I
admit it… I’m a slight teaching supplies hoarder, but I’m okay with that.
Coming
soon, I will share with you a post to describe a typical roadschooling day.
Come back to read all about what we do to educate our two and four year olds
while on the road.
God Bless Your Learning Journey ~
God Bless Your Learning Journey ~

I've linked up at...


I love your setup! I have been procrastinating on the set up of our mobile classroom. Its not an RV but it pretty much stuff that moves with us when we move countries. I loved finding you and Im going to add your articles about roadschooling into my worldschooling article
ReplyDeleteThank you! It's always neat to see how people set-up their learning environment. I'd love to see your worldschooling set-up!
ReplyDeleteVery cool! I know I've said this before but I'd love to roadschool! Maybe someday..
ReplyDeleteThanks for linking up!
Thank you for hosting and stopping by! I hope to see you on the road someday!
Delete