Tuesday, December 24, 2013

It's Snowing in Florida!!

In a recent post, I shared some fun activities Caleb and I did with cotton ball "snow." You can check it out HERE: The Cotton Ball Experience.  A few days later, my surprise arrived in the mail... Snow!

Ok... so it's not really snowing in Florida. I'm sure your initial thought was, "What? I can't believe it... It must be due to Climate Change (formerly known as Global Warming)."

Well, you can rest your weary heart. We have a few more years before that happens... I hope :)

Anyway, Caleb and I have been having a grand time playing with snow in Florida. Yes, the white fluffy stuff... No, not the cold stuff. Have I confused you enough yet? Maybe this will help...

http://www.amazon.com/Be-Amazing-Toys-SNO-500-Insta-Snow/dp/B000FA6APE/ref=sr_1_1?ie=UTF8&qid=1387856870&sr=8-1&keywords=insta+snow
I ordered this from Amazon since I knew we were not going to have any chance of seeing snow here in Florida this winter. Caleb and I have been reading books, singing song, and playing games all about snow and I wanted to give him an opportunity to somewhat experience it. I wasn't sure how it was going to be because I've never done it before, but we've had a great time and I look forward to playing with it more as we go visit family for Christmas.

My Review:

The price I thought was fair. Especially when we received the container and saw how much very little of the powder it took to make a good amount of snow to play with. This should last us through the winter for sure!

It was also very easy to make the snow. Just a few ounces of water mixed with a scoop of powder and POOF! It turns to snow in front of your eyes. Caleb loved doing it himself. He also enjoyed holding the powder in his hands as I poured the water over it. I'm sure in his eyes it was magical and I have to say it was pretty neat.

It's not cold... which is my kind of snow! You can however put it in the freezer to make it cold like real snow though.

I knew Caleb would love this and I was right! He was totally engaged for hours on several occasions.

The experience was well worth it!

http://rvclassroom.blogspot.com/2013/12/its-snowing-in-florida.html 

We enjoyed many sensory activities. 

First we made lots of snow and placed them in a dish bucket. 

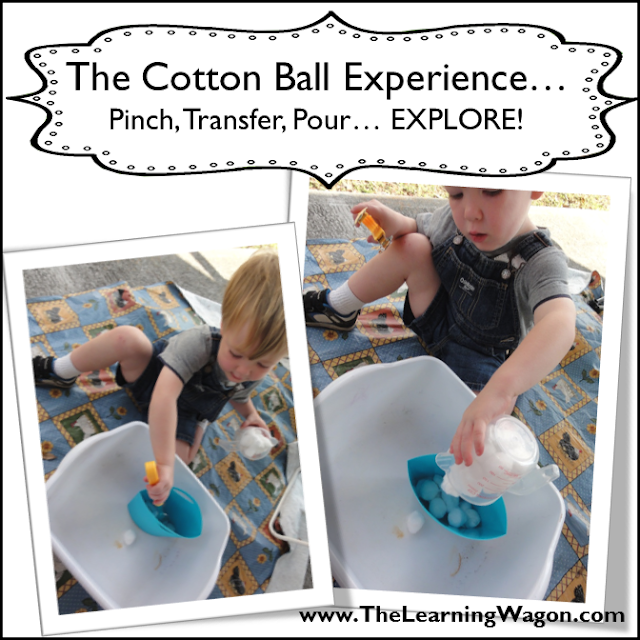
In one sensory activity, I gave Caleb a large spoon, measuring cup, and small bucket. He enjoyed spooning the snow into the measuring cup. Once filled, he poured the snow into the small bucket. 

In another activity, Caleb played with his mini trucks and tractors in the snow. He loved scooping the snow with his front end loader and fill up his dump truck. He'd drive it around and to the other side of the bucket, pour it out and do it again.

There are other activities we're planning to do. For one, I read in the directions that the Insta-snow will melt when you add salt to it. That sounds like a pretty neat experiment!

I'd recommend this product for anyone ready to have lots of fun!

Have you tried Insta-snow or another product like it? What did you think? Did you do any neat experiments? I'd love to hear about it! Please share in the comments!

God Bless your Learning today~


Friday, December 20, 2013

The Cotton Ball Experience (Pinch, Transfer, Pour... EXPLORE!)

Caleb has been excited about the Christmas experience. He loved getting his Christmas tree and decorating it. Now he is obsessed with Christmas trees! We've also enjoyed putting together a gingerbread cookie train. Since we're here in sunny Florida, we won't be getting any snow, but Caleb has been talking about it as he's seen fake snow at Stone Mountain and we've been reading about it in books. I have a surprise coming for him soon, but until then, we've been playing with cotton balls. Although they're not nearly as sensational, we've been enjoying our "snowball" fights, sensory bin explorations, singing about snow, crafting, and fantasy play with cotton balls.

  • We used cotton balls to have a snowball fight in the RV the other day. It was a lot of fun! 
  • I put together a sensory bin with cotton balls, a bucket, tongs, and a measuring cup. He loves using his tongs! He pinched the cotton ball and placed them in the measuring cup until it was overflowing with white. Then, he poured them in the bucket. This was a great way for him to learn the concept of full and too full!
http://rvclassroom.blogspot.com/2013/12/the-cotton-ball-experience-pinch.html


  • We sang the following song to the tune of "It's raining. It's pouring," while I poured snowballs over his head. 
It's snowing. It's snowing.
It's snowing all over Caleb.
He went to bed. Then he said,
It's snowing. It's snowing!
  • We created snowflake ornaments for my family with popsicle sticks. First, I had Caleb paint the sticks white. Then, I glued the sticks together to make a star-shaped snowflake. Then, I added small glue dots to the ends of each stick and had him pull apart small pieces of cotton ball to place on the glue. It added a third dimension to the snowflakes. Then, he added a foam snowflake sticker to the middle of the snowflake and I added a string on the back for hanging. They turned out great!
  • A few cotton balls, a truck with a trailer, and an excavator was entertaining for me to watch, but also engaging for Caleb's imagination.
We had a great time exploring and learning with cotton balls. I can't wait to share his surprise with him next week! He is going to have a blast!

God Bless your learning experiences!

Monday, December 16, 2013

The Fresh Squeezed Orange Juice Experience

Florida has been a wonderful place to spend our winter. The weather has been awesome, which means we can spend more time outside… which is a necessity when you’re cramped in a 24’ travel trailer with a 2 year old! I’ve recently shared about the awesome field trips we’ve been taking lately. Today, I have another incredible learning experience to share with you!


We are in the midst of orange picking season here. In fact the RV park that we are staying in is surrounded on 3 sides by an orange grove. They have stationed empty trailers along the roadside this past week to get ready for picking! I can’t wait to take Caleb into the fields to watch the farmers harvest the oranges from the trees!


Recently, we were driving down the road and pulled up to the intersection that is less than a mile from the RV park. As we take the right turn, we see oranges lining the road.  Obviously, a truck overflowing with oranges made a left turn here and accelerated a little too quickly, shedding a few extra oranges. There’s a food vender truck at this corner, so Andy jumped out and asked if they were fair game to collect or if there was a law against it. That might sound silly, but in our rural Georgia homestead, they are very serious about their crops and you could be charged with a felony for picking things. We never thought about picking up the cotton or smashed watermelons that line the roads where we live, so we just wanted to make sure it was legal… It was! In fact, the man in the food vender truck said if we didn’t pick them up, he would have to and he just tosses them. He even gave us some bags to collect them. We were so excited! 

http://rvclassroom.blogspot.com/2013/12/the-fresh-squeeze-orange-juice.html

 After collecting all the intact oranges and tossing the split ones in the field,  we took off to our original destination. Later that day, we decided to stop at the food vender truck for lunch. He made us hungry talking about his homemade shredded pork. While we were eating (BTW… It was the best pork sandwich I every had!), another truck made the turn a little too quickly and more oranges toppled off the top rolling right over to us. The vender stuck a bag out the window and we gathered up these freebies as well!


That night, Andy had borrowed an old fashion orange juicer from the park manager. It was her father’s… and it did an amazing job! I sliced the oranges in half. Andy placed one half on the manual machine and closed it tight pressing the lever. It was surprising to see how little was actually left on the rind when finished. We explained and shared the experience of each step with Caleb. He was engaged throughout the entire process! We collected the juice in an old container, but before putting it away, we all had a taste test.  It was the yummiest juice we’ve ever had and did I mention it was FREE! You can’t beat that! We hope to get more soon as this juice is disappearing quickly! In fact, we gave the food vender our phone number and asked him to call us any time he’s littered with oranges.  He said this will happen pretty regularly between now and March! 


Roadschooling in Florida has been a great experience. We've been able to present Caleb with many engaging learn opportunities this winter that keep that spark of learning aglow. I know it's December, too often a time of frenzy and chaos, but what have you done lately to ignite your child's love of learning? I'd love to hear about your experiences! Please feel free to share them in the comments!

Learning Blessings to your family,


Tuesday, December 10, 2013

Alligator or Crocodile?

Today’s field trip was to Gatorama in Palmdale, Florida. It is an alligator and crocodile farm that also houses a few other wild animals. This is one of the reasons I love being on the road. There are so many exciting things for Caleb to see, TOUCH, and learn about everywhere we go! Here are a few pictures so you can experience these animals with our family!

 http://rvclassroom.blogspot.com/2013/12/alligator-or-crocodile.html


Learning Blessings to you,


Tuesday, December 3, 2013

The Planned... and the Unplanned Field Trips

http://rvclassroom.blogspot.com/2013/12/old-fashion-field-trips.html

I remember when I was in pre-school visiting the city jail and fire station when I was four years old. One of the most vivid memories of this trip was the fact that both of these facilities were located across the street from the church school I attended and our whole class had to walk across the street. That must have been a big deal for me because I still remember that to this day, but I also remember meeting the police officers and fire fighters and the big red fire truck in the station. It was neat to look around the stations and walk through the jail. I remember feeling quite scared and holding my best friend, Sara’s, hand. She was never scared of anything. I think it is important for children to get out in the world and see these things first hand like we used to.  

When I taught in the public school, I was discouraged every year as field trips were cut to fewer and fewer until we just had one due to budget cuts. It is really sad that when there’s a budget crunch, it always seems like the most beneficial forms of education get cut (field trips, the arts, etc.).  

It makes me happy that I home roadschool Caleb and Lily Anne. They really get to see and be out in the world first hand. Today, was a field trip day to the Children’s Museum of the Highlands. They have a “Tot Time” where a teacher reads a book, sings songs, plays some games, and does a craft with the kids. It’s a really nice program. Today was Caleb’s first day and while he didn’t participate too much this time, I know with another visit or two he will be taking over the classroom. I watched him as he observed the other children dancing with scarves, studied the teacher’s reactions to him (she was great by the way) and listened to everyone singing. He was absorbing it all in. One area he did jump right into was  the craft, probably because we do so many together at home he felt very comfortable with this, not that we don’t sing and dance, but there aren’t any other children around except Lily Anne… 

After “Tot Time,” he explored the museum.  It’s a lot like the Interactive Neighborhood for Kids that we visited in Gainsville, GA about 2 months ago. It has a grocery store, a train that moves when you push the button, a real airplane, race car, fire truck, mail jeep, a water play area, life-size bubbles area, and so much more! He played, he explored, and he learned more than I know in these few hours. It was a good day…


But that was just the planned field trip…   As we were walking down the street to a local diner for lunch, Caleb pointed and said, “Fire truck… Wooo Wooo.” We all looked down the street and there was a fire truck pulled out in front of the station. We weren’t in a hurry, so we walked down to get a closer look. We met two firemen working on the truck. One offered to let Caleb sit in the fire truck. I whipped out my camera and started taking pictures when he offered to get a picture of the whole family. Then, while we took a look at the ladder truck, rescue truck, and 2 other fire trucks they had stationed there, the fireman ran inside and got Caleb a sticker badge and fire safety magnet. Caleb wore his badge proudly all day! The fireman gave us a brief tour inside the station where there are poles to slide down and more trucks out back! It was a very exciting day!


I encourage homeschooling parents and even public school teachers to contact your local civil services to see if they provide tours and can talk to your child(ren)/students about their profession. It is so much better to see these community helpers first hand in their place of business.

Blessed Learning ~

Tuesday, November 26, 2013

10 Turkey-tivities for Toddlers

Thanksgiving is just around the corner! Have fun with a turkey craft and lots of learning this Thanksgiving! I often like to incorporate a craft that Caleb and I can create together and then use that craft to enjoy learning in lots of ways. I hope you have fun with these Turkey Ideas!

http://rvclassroom.blogspot.com/2013/11/10-turkey-tivities.html

1. CREATE A TURKEY CRAFT – Enjoy some craft time with your child. You don’t have to create the same turkey as we did. There are many on the internet to choose from. There’s a link below to one site with directions. I would suggest using different colors of feathers so some of the activities below can be done correctly. It’s also best if you laminate any paper parts before putting the turkey together for durability through the activities.
2. SORTING TURKEY FEATHERS (COLORS) – Make sure one feather on the turkey craft matches the feathers provided, ,so if you have red, yellow, green, blue, orange, and pink feathers, then those should be the same colors on your turkey craft. Provide your child with a small bag of feathers  and let him/her sort them to the matching color on the turkey.
3. SORTING SHAPES TURKEY – Provide your child with a bag of shapes. Your child can sort one shape onto each feather. All the circles will go on one feather. All the squares will go on another feather, etc…

4. TURKEY SOCCER GOAL – Using the paper plate turkey craft above would actually work better than the one we did. I just did a paper turkey and then laminated it. The turkey was a little flimsy for this activity, but we got it to work. Using masking tape**, tape 2 kabob sticks to the bottom of the turkey coming out like legs should-width apart. Make sure the pointy end of the stick is facing down. Stick the pointy ends into the ground but leave enough room where a small ball can roll between the kabob sticks. Stand your child a few feet away and have him or her gently kick the ball through the sticks .


5.  TURKEY CROQUETThis uses the same set-up as above, but instead of having your child kick the ball, have him or her try to hit the ball with a small bat, kid’s golf club, or even just a stick aiming between the sticks.

6.  TURKEY BASKETBALL – Attach your turkey to the inside of a basket/bucket. Provide your child with a small ball and have him or her gently toss the ball into the basket/bucket.


7.  TURKEY POSITIONS – This is a fun activity that works on your child vocabulary.  First, “hide” the turkey in plain site. Have your child look for the turkey. When he or she finds the turkey use your vocabulary to tell where the turkey was, “The turkey was on the table or the turkey was above the chair.” If your child’s vocabulary is already strong, continue to develop it by asking him or her to develop sentences to tell where the turkey was hidden.


8.  TURKEY COUNTING (ONE TO ONE) – Have your child place one block on each feather as he or she counts them. You can have him or her match up number flashcards with each block as well if he or she is at that skill level.


9.  FEEDING TURKEY CORN – This is great for building fine-motor skills. Cut a slit on the turkey’s beak just big enough for a single  corn kernel to fit. You can also attach a plastic baggie to the  back with masking tape to catch the kernels.

10.  WINDY TURKEY – Attach crepe paper to the end of the turkey’s feathers and a craft stick to the bottom of the turkey using masking tape. On a windy day, go outside and have your child hold the turkey up or wavy it around to see the paper fly!
** I encouraged the use of masking tape since we are using the same craft for different activities. This will allow you to put on and take off items as needed. 

Do you have any other fun Turkey activities you would like to share? Feel free to post them in the comments! I'd love to get some ideas for next year!

Happy Thanksgiving Everyone! 

God Bless your Learning Experiences!


Wednesday, November 20, 2013

Roadschooling Set-Up

http://rvclassroom.blogspot.com/2013/11/roadschooling-set-up.htmlI realize that I’ve been doing this blog for a little while and I haven’t really explained what roadschooling is, at least to our family, and how we do it. That’s partially because I have been building the airplane as I have been flying it, which leads to the next reason… my set-up just wasn’t ready to share.

Now that we have settled into sunny Florida for the winter and plan to be here for a few months, I was able to set-up a more permanent roadschooling site that I can share with you. It’s still not perfect as it is a work in progress, but it is much more than we had and it is serving us well!

Let me go back a little bit before I begin sharing though and explain our roadschooling situation. My husband, aka The Chicken Whisperer, travels across the country with his sponsors doing events, workshops, and lobbying for the chicken love across the nation. We started traveling about 5 years ago and we would go from hotel to hotel sometimes night to night. As you can imagine, when Caleb came along our single traveling suitcase turned into multiple suitcases, a pack & play, sheets, food bags, toy bags, diaper bags, etc. Not to mention a baby in tow. We would just about fill those luggage carts hotels provide to the top with things hanging off the sides. Picture moving all this stuff into a hotel room for one night and back out the next morning every day for five days or more. Let’s just say, NOT FUN! Every time we saw an RV driving down the road, we would dream about how it would be so nice to just pack our stuff one time and be done. Not to mention, have a place where Caleb could take a nap on site! Finally, this past December we picked out the RV we wanted, saved up our money (we don’t like to buy things on credit), and purchased our very own 24’ Coachman Spirit of America travel trailer. It was the biggest RV we could buy that our current SUV could pull and we didn’t want to buy another vehicle.
At first, as we traveled for Andy’s work, we’d also find a fun spot to stay for vacation when the work was done. Then, we started finding spots to stay longer. We recently just spent 3 months in the north Georgia mountains watching the leaves change colors. Now we are planning to stay in Florida for the next 4 – 5 months over the winter. I don’t miss the cold. Yes, I’m a wimp! We plan to head home to the farm house for spring after some work traveling, so we can plant our garden and experience some homeschool there.
So that is our story of how our journey began. Now, let’s take a look at how I’ve set up our roadschooling through pictures…

Our outside learning environment. I put an extra table cloth on the concrete pad in front of us to learn on. The table next to the camper is hiding 4 storage drawers.

 These 2 storage drawers hold mostly craft and office supplies.

 These 2 storage drawers hold a variety of learning materials. The first bin shown on the left holds the following.
1. Holiday materials - foam shapes, stockings, and Christmas hats.
2. Fine Motor, Sensory materials, and Containers
3. Clipboard, Dry erase boards, mirrors, magnifying glasses, and tweezers

The second bin shown on the right holds the following.
1. Shapes, Numbers, and Letters Activities: I have a variety of activities for each concept. I organized all the games and activities together in gallon ziplock pages. For example, in the letter bag I have Di-cut letters, magnetic letters, letter matching games, flashcards, etc...
2. Manipulatives, Puzzles, and Play Dough
3. Water toys, Balls, Blocks, Chalk, Shape Sorter, Gardening tools etc...

 
 These boxes stay inside the RV. The tub on the left holds most of the materials I will use for teaching for the week. On the top right, I have a bin that holds all my paper goodies. This isn't my favorite way to store it, but it's what I'm working with right now. On the bottom right, I have a bin of books that I switch out each time I go home, hot glue gun and glue sticks, lamination machine, and teacher idea books.

 Here's a sample activity that we did today. I filled a tub with water, shapes, blocks, Thanksgiving foam shapes, a boat and sponge. I also gave Caleb a muffin pan. He had fun transferring water to the muffin pan and pouring it back in, cleaning the toys with the sponges, and having the turkey go, "nite-nite" by covering him up with "blankets" = shapes. It was fun to watch him play and learn.

I hope you enjoyed getting to know more about our roadschooling journey. If you have any questions or want to share any suggestions from your own experiences, I'd love to see those in the comments! 

Learning Blessings,

 
Related Posts Plugin for WordPress, Blogger...