
So you've learned "What is Roadschooling" and you've seen "Our Roadschooling Set-Up"...
Do
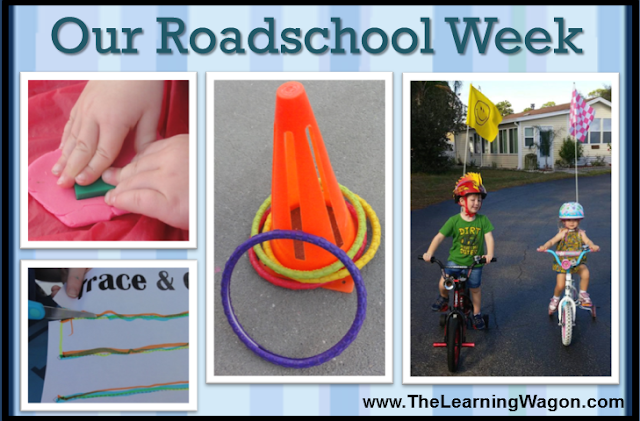
you want to take a sneak peek at our roadschooling week? Below, I will share
the fun learning activities we completed this week, Monday through Thursday.
Friday is a bit of a special day for us. We still do school, but it looks a
little different and I wanted to give myself plenty of room to write about it
in another blog post.
We’re
in Lake Placid, Florida right now, so the average temperature this week was
around 85°. Obviously, we aren’t having a snow day around here any time soon,
although we did get to play with snow, but I’m getting ahead of myself.
This
is our stationary time of year so our learning experiences may look similar to
those of homeschoolers. We do most of our learning outside because the weather
is beautiful (not too hot in the shade) and it also gives my husband some quiet
time to get work done or do the Chicken Whisperer radio podcast inside.
I
have a lesson plan book where I write down “goals” and “ideas” for what I’d
like to do with the kids each day, but I don’t set time schedules and I’m not
too upset if we don’t get everything done. In fact, I don’t think we have once,
but we’re learning and that’s what matters.
In my lesson plan book, I organize my activities by subject/skill.
Reading
Writing / Fine Motor
Math
Science / Social Studies
Art/Music
PE / Gross Motor
Sensory Play
For
the most part, except for reading, I teach both my children the same things at
the same time. They are age 2 and 4 with a total of 21 months separating them.
Reading is the only subject I’ve found that is difficult to do with both at the
same time. In fact, I wait until my husband is able to take one child for a
bicycle ride, a walk, or something else so I can focus on working with the
other child.
Now
that you have an idea of how I structure our learning time, check out some of
the activities we did this week…
Reading
I
like to think that I teach reading skills in just about everything we do. For
example, when we’re practicing writing our names, we’re working on identify
letter names or sounds; when we’re completing our Thankful Leaf Wreath for art,
we’re sounding out words together and writing the sounds we hear; when we’re
listening to stories about science or social studies topics, we’re making
predictions, drawing conclusions, and talking about fiction and non-fiction; and
so on.
That
said, I do have a reading curriculum that I use. When I taught kindergarten, I
fell in love with Cindy Cupp Readers and decided that is what I wanted to use
to teach my children how to read. Now with my children, I see great success. I
plan to do a future blog specifically about this curriculum and activities we
do with it in a future post, but I’ll tell you now that the reason I love this
curriculum is that it introduces letters, blending, sight words, and reading
all at the same time. Kids start reading earlier. They don’t have to know all
the letters to read easy sentences, so their confidence as readers skyrockets
early also.

Writing
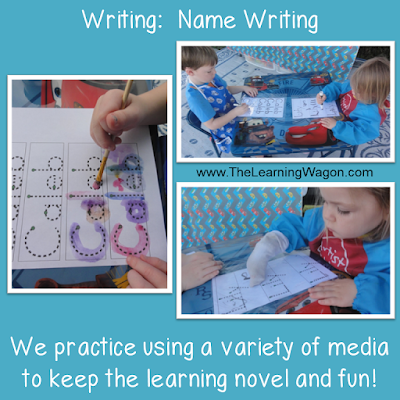
As
mentioned above, I try to do a daily name writing activity. I have created Name
Writing Papers where Caleb and Lily can start at the green dot and then follow
the black dots to write their name. To make it interesting, we practice it in
different ways. This week, they painted their names and wrote them with dry
erase markers. They each have a sock they use to erase their name. It helps
strengthen their hand muscles as well. As you can see, Caleb is at a stage
where he is using his tripod grasp while Lily Anne is still at the cylindrical
grasp stage. I’ve watched Caleb’s grasp naturally develop with little guidance
from me. I focus on providing him (and Lily Anne) opportunities to develop his /
her fine motor skills, which is why I incorporate these activities during our
writing time even if they aren’t specifically writing tasks, but as you
continue to read, fine motor skill work shows up in other subject areas as
well.
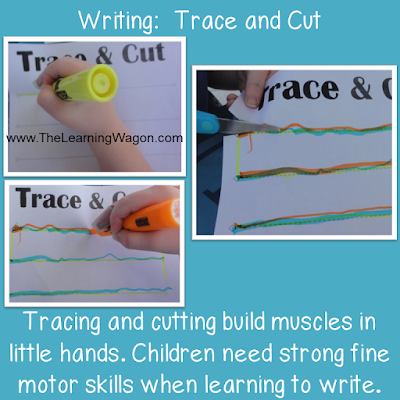
During
writing we also do a daily Scissor Skills activity. This is a product I created
to teach my children step by step how to cut objects out. Initially, they just
cut straight snips off the edge of the paper, then diagonals, and then they
move to cutting out straight, wavy, and zig zag lines. From there, they learn
to cut out boxes and other shapes until they can cut around the edges of any
object, like a dog or dinosaur. I have seen great improvement in their cutting
skills since we started this activity! Each day, their cuts stay more and more
on the lines.
Math
I’ve
played Play Dough Shapes before with Caleb, but now Lily’s old enough and she
can get in on the fun. There are many skills they can learn from this activity.
Sometimes, I tell the kids which shapes to make in their dough. Sometimes, I
make a shape and they have to tell me what it is (This is more challenging if you
blindfold them and they have to feel to guess what shape it is.). Sometime they
make pictures with different shapes and tell me which ones they used. If you
stretch out the play dough, they can make patterns with the shapes. Click the
picture to learn more about this fun learning activity.

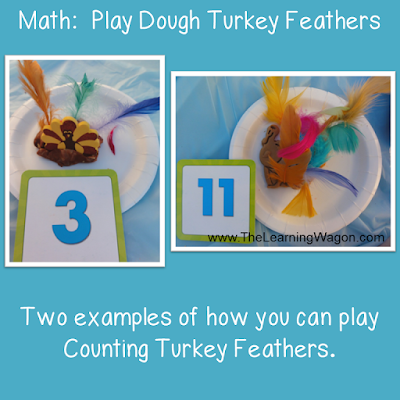
We
also used the play dough when we did our Turkey Feather Counting activity. I
set it up 2 ways, but both worked. I thought I had 2 turkey foam shapes, but I
only had one, so I stuck the turkey foam shape to a ball of play dough like the
picture on the left for Lily. For Caleb, I had him use a turkey cookie cutter
to make a turkey in his play dough as seen in the picture on the right. Once
set up, they picked a number flashcard from a pile and counted that many
feathers for their turkey. The feathers were placed in the ball of dough for
Lily and in the feather area of the turkey for Caleb as seen in the pictures
below.
Science / Social Studies
Since
Thanksgiving is coming up, we spent more time on Social Studies than on Science
this week. We read a book about Thanksgiving every day, which lead us into
talking about what we are thankful for, how Thanksgiving got started, and we
learned how to say “Happy Thanksgiving” in American Sign Language. This week, I
used this time as a lead in to what we had planned for art.
Art / Music
There
was also more of a focus on art this week than music, but other weeks will be
different. Plus, we always have a kids music CD playing in the background. I
love the outdoor speakers we have on our new camper! We spent a lot of time
creating Thanksgiving Cards for our family this week. We won’t be home for
Thanksgiving to spend it with them, so we wanted to send our love with
something special. What’s better than a handmade card? To begin, I traced each
child’s hand using a white crayon on the front of their card. I encouraged my
children to paint with many colors all over their paper. I cut out a headband
for each child while they decorated.
They glued the headband and two wiggly eyes on their hand print. I used a
permanent marker to add the nose and mouth. Then, they added foam shaped
stickers to decorate around the Indians they created.
We
also created an Indian Headdress this week. It was very easy and loads of fun.
I cut strips of foam and stapled it together until it fit around each child’s
head. I placed a variety of colors of feathers in a basket in the middle of the
table. Each child glued feathers to the inside of the headdress. I placed a
piece of tape across the feathers to ensure they stuck to the foam. Then, I put
the feathers away and filled the basket with crepe paper of varying colors. I
gave each child their scissors so they could choose a color to cut and glue to
their headdress all the way across. Initially, I was going to encourage my kids
to create a pattern with the crepe paper colors, but we got so into the
activity… I forgot. Oh, well! We had some pretty jewels in our craft supplies,
so we glued those on to for a little sparkly bling. Then, I had the kids wear
them to the Thanksgiving dinner we ate at church. Later, we took pictures
wearing our headdresses that we’ve printed out to put inside each card we
created and will be sending them to our family.

Reminding
our kids to be thankful for what they have is something we should do often. I
don’t think it comes naturally. We’ve always taken care of them and given them
what they needed and a lot of what they’ve wanted, so they expect it. I think
completing crafts like the Thankful Leaf Wreath and giving thanks in our prayers
helps bring their attention to what they have and what they should be thankful
for, but it’s those times in life where we lose what we have that we learn what
being thankful is all about. After reading, Thank You, Thanksgiving, by
David Milgrim, we brainstormed a list of things we are thankful for and sounded
each word out together as I wrote the letters we heard. I gave my children one
leaf at a time to pick one of the words we wrote on the list or a different one
and write it using a pen. They wrote one word on each of the six leaves they
were provided. Then, they glued the
leaves to a circle of construction paper I had previously cut out. We let it
dry and now they are a beautiful decoration in our camper and a reminder of
many of the things we give thanks.

PE / Gross Motor
I
would say the majority of our schooling is spent on gross motor skill
activities. Like most, my kids have a lot of energy and I try to keep them busy
with structured activities so they don’t end up hurting each other burning off
steam. I’m not saying they don’t have any unstructured time, because they do.
They need some unstructured time too in order to come up with their own
creative ideas, but we usually do this after we’ve done something structured
that wears them down just a bit. I try to fit in a structured or unstructured
time between our sitting tasks, to let them get their energy out in a
productive way.
Our
family loves to ride bikes together. We go on several bike rides every day. Our
goal this week was to teach Lily to use her brakes. Since Florida is so flat,
she’s just been coasting to a stop, but she’s learning.

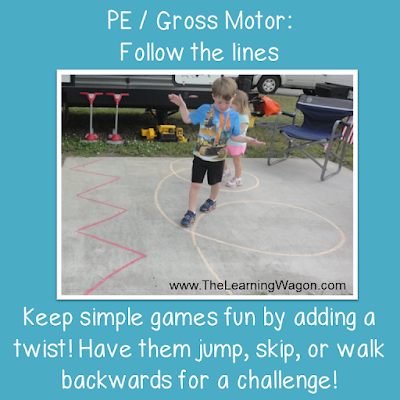
Follow
the Lines is a simple balance activity with chalk. I drew a straight, curvy,
zig zag, and loopty loop line that Caleb and Lily practiced walking on from one
end to the other. I told them not to fall off or the alligators would nibble
their toes (We are in Florida after all). They added a fun jump off the patio
when they reached the end. They walked forwards and backwards, jumped and
hopped, and more.
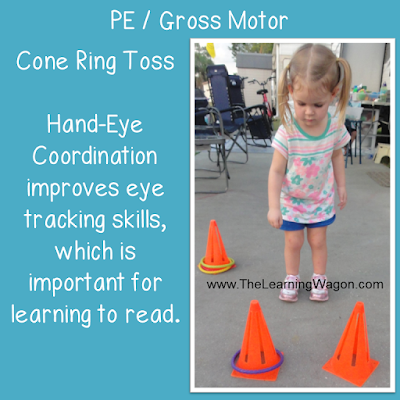
I
bought some pool rings on the clearance aisle one time and it was a great buy.
We use them for so many activities and none are actually in the pool! This
week, I put out four cones and we played a Ring Toss game.
Sensory Play
Even
though we are in Florida, we still play with snow. It’s just not REAL snow. Sometimes we have several
different sensory bins in a week, but this week, we enjoyed playing with the
white stuff. We talked a lot about how this snow compared to the real snow we
played in when we went to Ohio this past early spring. The kids did a lot of
scooping and pouring, driving their trucks through it, pretending to cook with
it, but we also did a lot of “getting along” practice. We practiced understanding
that if someone makes a pile of snow with their dump truck, the other child
should not take any snow from that pile without asking. We practiced sharing
the tools that were made available to play with. We practiced using our words
to talk about what we are doing with the snow we are working with so the other
child can use snow from a different area and other fun sibling games. Notice… I
said we “practiced” these skills… I didn’t say we “learned” them… maybe another
day.

For
the most part this is a list of the majority of the learning activities we did
from Monday through Thursday. We played most of these learning games more than
once during the week to get more practice. Depending on their interest in the
activity I usually wait a day or so before doing it again.
I
will be sharing more about what we do on Fridays in another upcoming post, so
come back soon and check it out! You can also follow me on Facebook or Twitter
to see what we do each day and share your learning experiences too. I’d love to
get to know you better and see what your schooling environment looks like! We
all do things so differently and it’s interesting to see what works for others.
I’ve always said that sharing our ideas makes us better teachers!
God
Bless You on Your Learning Journey ~

You can find me at these great Link Ups!
Great Post, Jen! I love the graphics and link back to your scissor activity. I am going to download this to use with our special needs daughter, Katie. Thanks! Gave you a tweet on Twitter.
ReplyDeleteThank you Missy! I appreciate you stopping by and spreading the word for me!
DeleteWhat fun ideas! You have such creative ideas. I love your blog!
ReplyDeleteThank you Chrissy! I love to hear that!
ReplyDelete