
Now that Christmas is over, you have 2 choices...
2. You can use it for fun and educational experience all year!
If you don't have any wrapping paper, this is also a great time to buy it on the Clearance shelves. I recently went to the discount store and found a great deal on wrapping paper. It’s not too hard to do. When I’m looking to buy wrapping paper, I look for the below components in this order.
1. Price ( I really don’t like to
spend more than a dollar…yes, I’m cheap! I mean,
Frugal!
2. How much is on the roll
(obviously, the more the merrier!)
3. The thickness of the paper –
Some rolls are super thin and while it will work if that’s all you can find,
it’s best to get a thick sheet.
4. Last… the design.
Wrapping paper can be used in so many ways and I keep seeing the benefits of keeping a roll around!
Wrapping paper ideas:
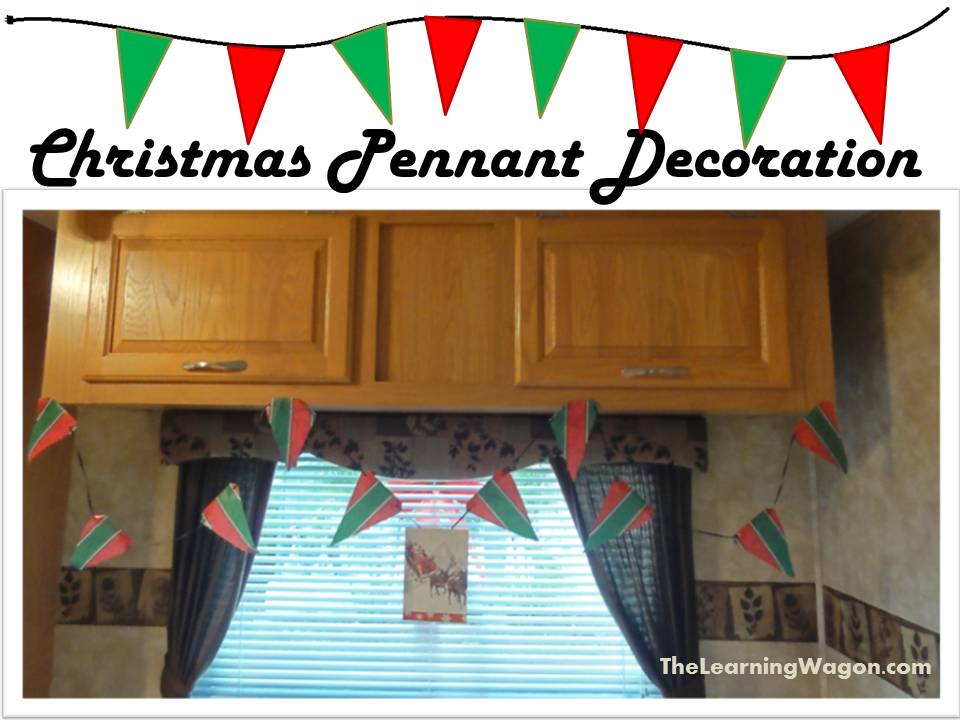
1. Holiday Pennant Decoration - I know this is coming late for Christmas, but I wanted to share our festive RV decorations! Plus, you can do this for any holiday based on the design on your wrapping paper. All I did was cut out triangles and attached them with a piece of tape and ribbon. We hung our Christmas cards on them as we got them, which made it even more fun!
2. Free coloring! - As long as you don't buy the roll of paper that is double sided, wrapping paper is usually white on one side. Give your child some crayons, markers, or colored pencils and let him or her let the creativity flow!

3. Bulletin Board Cover - Wrapping paper is festive and colorful. You can easily use it to cover your bulletin board for the holidays. Extend its usage through January by purchasing winter scenes with snowflakes and snowmen.
4. Art Canvas
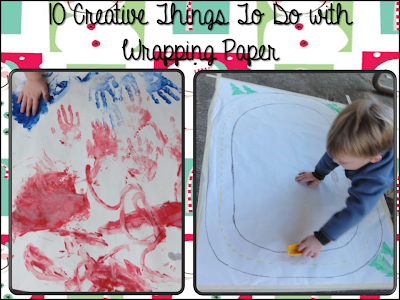
or Art Drop Cloth - The picture below shows my son hand painting on the back side of wrapping paper, but I often pull out wrapping paper to cover our workspace when we are using glue and other messy mediums. Usually after we are finished with our project, I will let him free draw on the paper.

5. Photo Backdrop - The picture below was actually taken with a vinyl table cloth, but wrapping paper would make a beautiful backdrop to a photo opportunity with your child too!

6. Transportation Map for cars, trains, and boats - You can make this as simple or as complex as your artistic abilities will take you. All you have to do is draw the biggest circle on the wrapping paper as you can fit. Then, take two of you child's vehicles and draw another circle on the inside of the first. Add any additional details like yellow lines, trees, stop signs, a lake for boats, barns for the animals, etc. Typically the wrapping paper is too wide to run through the personal-use laminator so if you intend to use the map more than once, I recommend using shipping tape all the way around the edges to prevent rips. You could easily fold this up and store for later use.

7. Life-size graph - If you're graphing something small like the links seen in this picture, you can either draw a grid pattern to fit the shapes like I did or you can use wrapping paper that has a cutting grid already marked on the back. You can create bigger grid graphs to graph shoe styles, toy types, or even boys and girls in your family!

8. Handprint Ornament - This is another Christmas one, but if you like it you can just be ready for next year. I traced Caleb and Lily's hands on the wrapping paper and cut each out. I took a cute picture of Caleb and Lily wearing reindeer antlers. Then, I printed the pictures out in a heart shape, cut them out, and glued them to the decorative side of the wrapping paper. On the back, I wrote each child's name and year.

9. Wrapped Up Sensory
Bin - This year, I wrapped several extra ornaments and had Caleb unwrap them. Next year, I'm going to incorporate this bin with decorating the Christmas tree. Each day I'm going to wrap 5 - 6 ornaments for Caleb to unwrap and use to decorate the tree. I added the picture of him placing the trash in the can because it is never to early to teach them to clean up.

10. Life-size Game - This could really take any form from a life-sized board game to a card game. I took a scrap piece of wrapping paper and drew giant shapes on it. I put some blocks in a large hat. I told Caleb the name of a shape and he pulled out a block and placed it on the shape I said. At the end we counted the blocks that were on each shape and talked about how some had more, some had less, and some had equal. Since he did such a great job, he got to wear the hat at the end of the game.
I also love playing life-size board games with wrapping paper. All you have to do is roll out a large sheet and draw squares around the edges. Write start in one square and finished in another. Show your child a number to name, a sight word to read, or have them copy a clap-hand-slap pattern in order for them to move from one space to the next. Be creative and have fun!

Have a blessed learning day!
Great post! Love these ideas! Pinned it.
ReplyDeleteThank you Anna!
Delete