Showing posts with label pumpkin. Show all posts

Wednesday, October 14, 2015

Five Pumpkin Seed Learning Activities

http://rvclassroom.blogspot.com/2015/10/five-pumpkin-seed-learning-activities.html


One of the best manipulatives for October is pumpkin seeds. There are so many things you can do with them. We had a great time with these five activities, but there’s so much more you can do with pumpkin seeds!

http://rvclassroom.blogspot.com/2015/10/five-pumpkin-seed-learning-activities.html


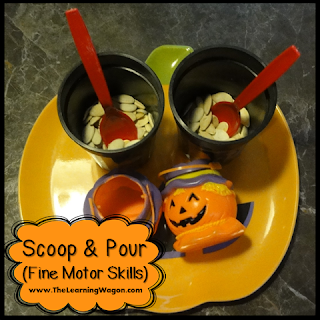
Scoop and Pour (Fine Motor)
Materials:
Pumpkin Seeds
Plastic Cups
Small Plastic Halloween Baskets
Plate
Spoon

Set-Up:
1. Place a cup, small plastic Halloween basket, and spoon on the plate.

2. Pour pumpkin seeds in the cup. There should be enough pumpkin seeds to fill the basket without overflowing.

http://rvclassroom.blogspot.com/2015/10/five-pumpkin-seed-learning-activities.html

Directions:
1. Have your child use the spoon to scoop pumpkin seeds from the cup and pour them out in the small Halloween basket until the cup is empty.

2. When finished, have your child pour the pumpkin seeds from the basket back into the cup so he can begin again.

http://rvclassroom.blogspot.com/2015/10/five-pumpkin-seed-learning-activities.html

Making Letters or Words
Materials:
Pumpkin Seeds
Plate or Bowl
Letter or Word Cards

Set-Up:
1. Place a large letter or word card in from of your child.

2. Provide your child with pumpkin seeds in a plate or bowl.

Directions:
1. Have your child pick up one pumpkin seed at a time and place it on the letter or word provided to practice the shape of the letter or word he is creating.

Lily practiced writing her name with pumpkin seeds while Caleb practice some –at family words he has been practicing.

2. (Optional) You could have your child glue the pumpkin seeds to the letters to create a fun craft, but we just like putting them on and taking them all for continuous fun!

http://rvclassroom.blogspot.com/2015/10/five-pumpkin-seed-learning-activities.html


Pumpkin Seed Points
Materials:
Pumpkin Seeds
2 Plate or Bowl
Skill Flash Cards
1 Die

Set-Up:
1. Place pumpkin seeds in a plate or bowl.

2. Provide your child with a second plate or bowl to hold the pumpkin seed points he earns.

Directions:
1. Show your child a flashcard. Caleb is practicing reading short a words, so these were the flashcards he was shown, but any skill can be practiced by using addition or subtraction flashcards, dates in history, science vocabulary, and more!

2. Once your child provides a correct answer to the flashcard, he can roll the die, identify the number shown, and count out that many pumpkin seeds to put on his plate. These are his points. You may want to create a goal of earning 30 points to end the game or if you’re playing with multiple children, you can set a time limit for the game and see who has the most when time is up.
http://rvclassroom.blogspot.com/2015/10/five-pumpkin-seed-learning-activities.html

One-to-One Counting
Materials:
Pumpkin Seeds
Plate or Bowl
Die

Set-Up:
1. Provide your child with pumpkin seeds in a plate or bowl and the die.

Directions:
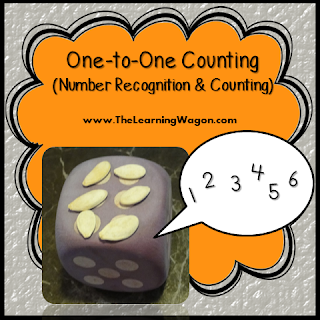
1. Have your child roll the die and count how many dots. Then, have your child count out the same number of pumpkin seeds.

2. You can have your child match up the pumpkin seeds to the dots on the die if you use a large one. I got mine from the Dollar Tree.
https://www.teacherspayteachers.copinm/Product/Monthly-Themed-Counting-Centers-1573073


Number Recognition & Counting Craft
Materials:
Pumpkin Seeds
Glue

Set-Up:
1. Provide your child with pumpkin seeds in a plate or bowl and glue.

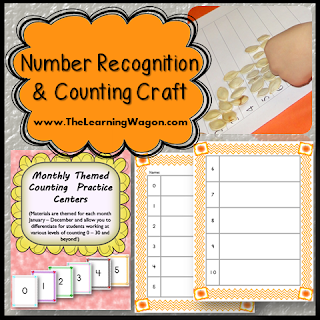
2. Provide your child with printable pages from
Monthly Counting Practice Printables.

Directions:
1. Have your child identify the number at the top of the page and glue that many pumpkin seeds to the paper.

This is great for children to see how numbers grow by one!

Have you tried any activities like these? How did it go? I’d love to hear your experiences and any other fun ideas you’ve done with pumpkin seeds!

Keep coming back! I have more ideas to share!

God Bless Your Learning Journey ~

 If you liked these activities, you may also like Observation Journal (Pumpkin Studies)!

Parties I've Linked Up to...
Chaotic Bliss Homeschooling

Monday, October 27, 2014

Spooky Craft-ivity Decorations

http://rvclassroom.blogspot.com/2014/10/spooky-craft-ivity-decorations.html 
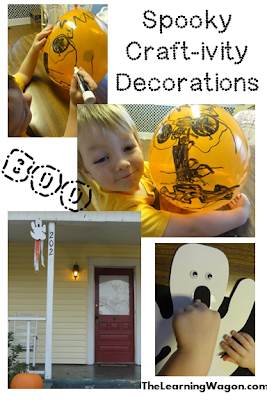
Halloween is just around the corner and I am always waiting until the last minute to decorate, but I wanted to share with you some cute, EASY crafty decorations you children or students would love to make to help you decorate you classroom, home, or even RV! 

The best part about the Jack-o-Lantern Balloon activity is that you only need 2 materials. A balloon and a marker. We used a dry erase marker because it was big and fat... good for my 3 year old to grip versus the skinner permanent markers I had on hand.
 
http://rvclassroom.blogspot.com/2014/10/spooky-craft-ivity-decorations.html 
You can choose any size orange balloon to do this. I said orange because... well that's the color of a traditional pumpkin, but your kids my want to be more creative and make green Frankensteins or witches, white ghosts or mummies, or purple monsters! Let the creativity go WILD! 

Wit my little one, I had him tell me what shape he wanted the eyes, nose, and then for the mouth he told me he wanted a frown with flat teeth. (Good way to develop descriptive vocabulary as well as practice his shapes!) When I did this activity with my kindergarteners, I would first create a Jack-o-Lantern balloon with my students. I cut out various shapes of eyes, noses, and mouths and put them in a lunch sack. I called on different students to pick one out of the bag. They would trace the shape they picked to help us create a class Jack-o-Lantern. Then, I would let each student decorate their own. If they got stuck and didn't know how they wanted to create the mouth or other parts, they could refer back to the shapes in the lunch sack. These were fun to hang all around the classroom! 

http://rvclassroom.blogspot.com/2014/10/spooky-craft-ivity-decorations.html 

Coloring in the shapes helps develop his hand-eye coordination skills, but he actually added a step on me... He always does! He decided to add a few more details on his own like glasses, tears, spit coming out of his mouth, and he turned his nose into a car. Can you see the wheels coming out of the right side of the rectangle?


The Ghost Windsock activity is another easy and fun activity! All you need is a white foam sheet, a black foam sheet, some crepe paper (white and orange), pen, wiggly eyes, glue, ribbon, and a stapler or tape. We also used some sparkle filler to jazz it up a little!
http://rvclassroom.blogspot.com/2014/10/spooky-craft-ivity-decorations.html 

I had a ghost pattern that I created when I did this activity with my kindergarteners. I just drew the design I wanted on a file folder and then cut it out to use as the pattern for them to trace. Sticker wiggly eyes are the best, but a dot of glue works too. If you put the staple through the mouth area of the ghost, you can cover it up with the mouth when you glue it down.

http://rvclassroom.blogspot.com/2014/10/spooky-craft-ivity-decorations.html 
I usually use a stapler to attach everything together (crepe strips, the back of the foam, the ribbon), but if you don't want your children to use the stapler, you can have them tape the crepe strips down and tape the foam together in the back and use tape to secure the ribbon. In the classroom, I had my students create a pattern with their crepe paper. Some would lay out orange, white, orange, white across the black foam. Others would do orange, orange, white, orange, orange, white, etc. 
http://rvclassroom.blogspot.com/2014/10/spooky-craft-ivity-decorations.html 

Like I said before, these activities are perfect for the classroom, home, or perfect on the awning of your RV if you're schooling on the road. We happen to be home for a couple of weeks, so ours is hanging on the porch, ready to spook some Trick-or-Treaters!

Have a wonderful and safe Halloween everyone... where ever you are!

God Bless Your Learning Journey ~


I've linked up at:


Crafts on Sea

Related Posts Plugin for WordPress, Blogger...