Showing posts with label DIY. Show all posts

Wednesday, December 2, 2015

A Bright Idea Countdown Christmas Advent Calendar

http://rvclassroom.blogspot.com/2015/12/a-bright-idea-countdown-christmas.html


I’m late sharing this… but I didn’t get it up until last minute myself. We don’t usually do Advent Calendars, but this year I wanted to try it. We’re actually doing two. One is a scripture based reading that a friend shared with me. You can find more information about it by CLICKING HERE. The second is the fun Countdown Advent that I made and we put up together.

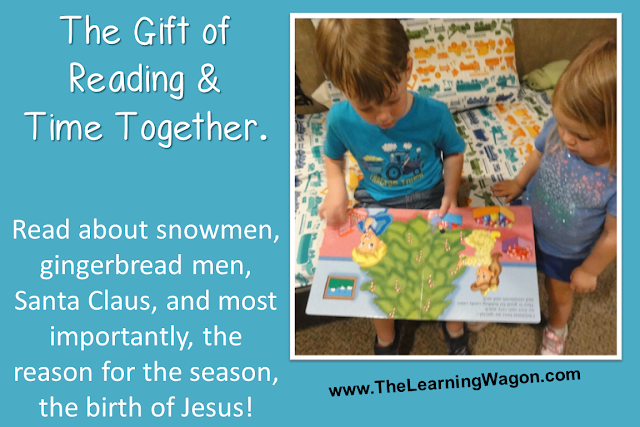
Each day we count down the days by turning a Christmas light number around and then my children receive a book with a Christmas or winter related topic that we read together.

The first thing I did was pull out of my stash 25 books to wrap. I wrapped books about snowmen, gingerbread men, Christmas trees, Christmas morning, and Santa Claus, but the most important books are those about Jesus, the reason for the season. I kept a permanent marker close by as I wrapped so I could write the title of each book on the outside of the wrapping paper. This time of year, themes pop up in our weekly learning. For example, our theme this week was about Christmas trees, next week is snowmen, the following week is gingerbread men, and the week of Christmas is the birth of Jesus. With that in mind, I ordered my books so that my children would open a book that related to our theme for the week and stacked them so I could just grab the top book to give them each day. After wrapping all these books, you could create a decorative piece like the Christmas tree shaped stack found HERE, but I just stuck mine in a cabinet. If I left them out, I knew they wouldn’t stay wrapped very long. All it would take is a trip to the bathroom for me and they’d have wrapping paper under their fingers!

http://rvclassroom.blogspot.com/2015/12/a-bright-idea-countdown-christmas.html


Countdown Christmas Advent Calendar


http://rvclassroom.blogspot.com/2015/12/a-bright-idea-countdown-christmas.html


Directions
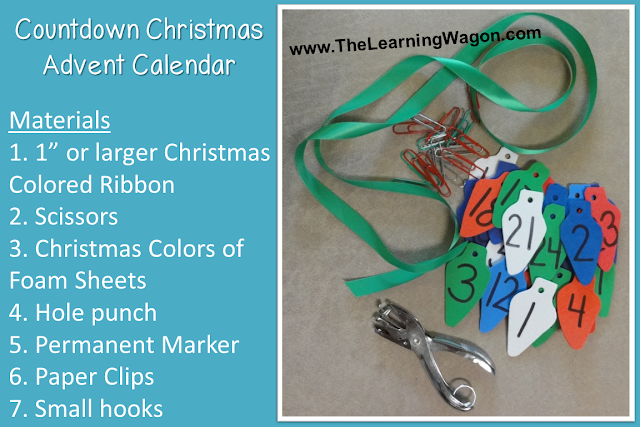
1. Cut out 25 Christmas tree lights from foam shapes. Mine are about 2.5” L X 1.5” W. Once I cut the first light, I used it as my pattern for the 24 others. I used foam from my scrap pile so I wasn’t able to do a pattern with the colors, but could be an option for you.

2. Write one number on each Christmas light from 1 – 25 as large as you can using a permanent marker.

3. Make a hole at the top of each Christmas light.

4. Lay all the lights out in order on the ground and measure how long your ribbon needs to be. Add about 2” extra of ribbon on each side. Also, make sure your Countdown Advent Calendar will fit in the location you had picked out. I didn’t have an area large enough to fit our Countdown Advent Calendar, so I made two rows by cutting my ribbon in half.

5. Fold each end of your ribbon in about ½” and using your scissors cut a tiny slit. This will allow you to slide the ribbon onto the hook for hanging. Since I had two ribbons, I had to cut four slits. If you’re going to hang the ribbon as one piece, after cutting one slit on each end, I would fold the ribbon in half and cut a third slit so there is not too much slack in the ribbon once you put all the lights on.

6. I used 3M hooks to hang our ribbon. I slid the ribbon onto the hooks, stuck one side to the wall, eye-balled the ribbon to be level, and stuck the other hook to the wall. Since I had a second row, I put a paper clip onto the middle of the first ribbon and place a Christmas light on the clip to give me an idea of how low it would hang and where I should place the second ribbon. Then, I repeated the process to hang the second ribbon below the light.

7. I didn’t have enough paper clips of one color, so I decided to create a pattern. I had my children sort the three colors I chose to use. Then, I asked them to hand me a certain color paper clip to hang on the ribbons. Once we got started, they told me what color went next. I made sure to slide the paperclips on the ribbon the same way each time. For example, I slide the small side of the paper clip to the back of the ribbon and the open side of the paper clip was on the right side. It looks neater this way and it made it easier on the kids when they placed the lights on the clips to keep them all facing one direction. Older children could slide the paper clips onto the ribbon themselves.

http://rvclassroom.blogspot.com/2015/12/a-bright-idea-countdown-christmas.html 
8. Next, I placed all the lights number side up. My children took turns finding the numbers and placing them on the paper clips. All I did was pull the open end of the large side away from the paper clip a little bit so it was easier for them to slide the hole of the light down onto the paper clip. If the kids put the lights on with the number side going on first, the numbers all faced forwards. When a day has passed, the kids take a number off and flip it over so that the blank side goes on first and the number faces the wall.

http://rvclassroom.blogspot.com/2015/12/a-bright-idea-countdown-christmas.html


9. Last we open our book and read it together. It’s fun activity that gets us in the spirit of the holiday! I hope you enjoy it too!
http://rvclassroom.blogspot.com/2015/12/a-bright-idea-countdown-christmas.html


Do you use an Advent Calendar? DIY or bought? Feel free to share what you do with others in the comments below or find me on Facebook or Twitter! I always love to hear from my readers!

God Bless You on Your Learning Journey ~


You can find me at these great Link Ups!
 

Monday, July 28, 2014

DIY Learning Whiteboards


http://rvclassroom.blogspot.com/2014/07/diy-learning-whiteboards.html
Have you ever had something lying around that you know you’re definitely going to use, but you’re not sure how yet? Well, I have a lot of these things! I did finally figure out how I was going to use one of them, two different ways! That’s what I’m going to share with you today.

I’ve been working in my classroom getting things organized.  This is still a work in progress that I will share with you one of these days, but I came across a sheet of dry erase sticker paper. I remember buying it (my guess… 8 years ago) from the CLEARANCE aisle in an office supply store. In my classroom, I used it in various ways . For several years, I stuck a section of it to the wall. At the beginning of the year,  my kindergarten students were to write their name each morning on it as they entered. Later in the year, I wrote a question on it that they had to answer. One question was, “Do you have a pet dog?” 

 We also used it in some learning craft activities. For example, I had the students create a clock with moveable hands. At the bottom, they stuck a rectangle section of the white board sticker where they could write and erase various times they showed on the clock. 


Over the years, my dry erase sticker paper has whittled away. Well worth the 50 cents I spent on it. (Did I mention, I LOVE the CLEARANCE section?) Anyway, this week, I was left with less than a 3 foot square.  I already have a dry erase board and 30 small individual sized ones, so I wasn’t sure how to use it. I could just store it, but I really wanted to use it with an effective purpose. As I looked around my classroom, I spied a Melissa and Doug tray that got left outside and became discolored. I was going to paint it, but I thought how cool it would be as a whiteboard, especially in the car. I won’t have to worry about markers rolling and falling on the floor. Everything is self-contained.  Here’s how I made it…

D.I.Y. Learning Whiteboard Tray

1. Measure the dry erase sticker and cut it to size. Remember... Measure twice, cut once, and measure again before sticking it down!

2.  Pull the backing about 3 inches away from the dry erase paper from one side all the way across to the other. Fit the paper in the tray and rub the pulled back section down until it has a good stick. 


3. Continue pulling the backing a few inches and then pressing down to make sure you don't get any bubbles and you get a good connection to the tray.

 Then, you're new Whiteboard Tray is ready to use! 

That said, below are a couple of tips you might find helpful. 

 1. I didn't want to paint my tray (I wanted to keep it the same as the others), but if you do want to paint your tray, the best time would be prior to sticking the dry erase paper down so you don't have to worry about getting paint on the dry erase paper. I would do this a day prior to sticking the dry erase paper down to give it plenty of time to dry.

2. My dry erase paper has traveled around with me for many years, so some of the stickiness around the edges began to curl up slightly the next day. A little bit of Rubber Cement  and you have nothing more to worry about! As a second choice, I also thought about purchasing some decorative duct tape to go around the edges. That would probably work as well and add a fancy design!


WAIT! I'M NOT DONE!

My second craft was inspired by a dirty clipboard. There's no way to clean it, so why not cover it up with something useful. For one, I don't have to grab paper to jot down a few notes... it's already a hard, flat surface. Caleb can draw and erase as frequently as he wants to and the clip can keep his marker in place. Also, I thought it would be useful to use as scratch paper under their work as they get older. I'm sure I'll figure out many more benefits of creating a Whiteboard Clipboard as the years go on...
 
D.I.Y. Learning Whiteboard Clipboard

1. Measure the dry erase sticker and cut it to size. Remember... Measure twice, cut once, and measure again before sticking it down!

First, stick the dry erase paper under the clip and use a pen to mark how wide the clip is and trace the bottom of the clip. 


2. Cut that section and slide it back under the clip.

Then, flip the clipboard over and trace around the outside of the board onto the back of the whiteboard paper. I used my other hand to hold the paper close to the board since it doesn't lay down flat. Then, cut on the inside of the line that you drew as it will be bigger than what you need.

3. This step would be easier if you have an extra hand, but I didn't so you can do it on your own if you need to. Pull the backing away from the dry erase paper far enough that the sticky part showing goes down beyond the clip. If you have an extra hand, have one person hold the clip up while you press down the dry erase paper from the top of the clipboard to below the clip. If you are working alone, like me, I sat on the floor and pressed the clip open with my foot and then rubbed down the dry erase paper with my hands. Once you get everything stuck below the clip, you can let the clip down and continue pulling the backing a few inches and then pressing down to make sure you don't get any bubbles and you get a good connection to the board.

 *** If you have any dry erase paper hanging over when you are finished, you can flip the clipboard over once again, press a thick notebook against the front of it, and use an X-acto knife to trim the edges. 

Then, you're new Whiteboard Clipboard is ready to use! 
 

 I hope you enjoy these learning crafts with your family or students. I know they are going to come in handy in our household! I wish I had more whiteboard sticker paper so I could do multiple trays and clipboards. I'm sure there are other objects that would turn into useful teaching and learning tools with this simple addition. If you think of any, please share them in the comments. I may just have to pay full price for this crafting material next time!

Have a blessed learning journey ~


Related Posts Plugin for WordPress, Blogger...