First Day of Homeschool 2017

Is it cheating if we started
school before our first day of school?
Last
year, after tons of research, I bought a curriculum for our kindergarten year
that in theory was perfect… You can read all about it in my earlier blog post
HERE.
While
on paper (literally) it was all paper work. It looked good, when presented as “school”
to my children, it wasn’t a hit. The Curriculum wasn’t the only thing to blame
for our difficult kindergarten year. My son had at the time a medical issue we
weren’t aware of that was diagnosed in January causing issues with focusing and
other areas. Not to mention, once he was diagnosed, we had to take a month off
of school just to get our lives back together.
Unfortunately,
all the stress from last year has caused him to think of school in a negative way.
That last statement has literally caused this Mama-teacher’s heart to break. In
my years as a kindergarten and second grade teacher, I have always strived to
make learning enjoyable even for the strugglers. “I hate school!” is not an
easy thing to hear from your own kid when you have dreamed of being his
kindergarten teacher for 5 years, eagerly waiting for the day to officially
homeschool him and bring that same love of learning that you ignited in other
people’s children to your own.

So,
I began my search again for another curriculum that would help guide me through
his first grade year… Something that tied learning about God’s world throughout
the subject lessons. Something that kept lessons short, engaging, and rich
academically. This year, I chose to go with the Heart of Dakota Curriculum (HOD). Little Hearts for His
Glory is their first grade level. I purchased the first grade
economy package and the first grade basic package for Caleb and then some
extras for Lily because she always does work with us. I decided to continue on
with Cupp Readers for our phonics program
instead of purchasing the ones suggested.

I
loved how the lessons were divided up on the page for each day. You can see a
sample HERE.
I loved the activities they suggested. I loved the books that we received from
our purchases… I was excited!
But…
I was also nervous. We have 12 more years of homeschooling. 12 miserable years
if I can’t change his attitude about school. This leads me back to the question
I first asked…
Is
it cheating if we started school before our first day of school?

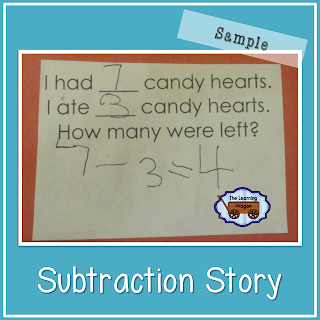
We
took our new HOD curriculum out for a test run. My initially thought was to do
one lesson a day and see how it went, but to my surprise and delight, when we
finished the first Science lessons, they were asking for more! I almost cried,
but I didn’t have time, because I was too busy reading the directions for the History
lesson, and then the Bible study lesson, and the Rhymes in Motion lesson, and
then Music lesson! We finished the entire school day except reading and math.
Over the course of the next 3 weeks, we did a little more and a little more.
Before the actual planned first day of school, we had finished 6 days of
lessons! On September 5, 2017, we started with a little photo session (as you can see) and then began our official first day of school, which went great! We still have up and down days and times within the school day, but
things are better. I pray they continue to improve as the school year goes on
so I never hear those horrible 3 words again.
I
may be crazy wanting to add any more to our plate during the school day, but I
still think calendar time is important and keeping track of the number of days
of school is a great way to develop number concepts. HOD does not include
lessons for these activities, so I decided to create my own, which I plan to
share more about in a future post, so visit back soon to hear more about it.
I
hope your school year is off to a great start. I pray you never hear those 3
awful words and if you do that you are able to restructure your homeschool in a
way that works for your whole family. I’d love to hear your first day stories
below and I’d be happy to answer any questions about the first grade Heart of
Dakota curriculum.

God
Bless You on Your Learning Journey ~