What is Hoteling It?
You
might be thinking, is this like when we go to the beach for a week? Not
exactly…
This
may not be something you ever need to do, but some people plan this type of
trip occasionally while for others this is a daily way of life.
For
those of you that might be new around here, my husband is known nation-wide as
the Chicken Whisperer. A couple
of times a year, he tours the country to speak at workshops and do book
signings. These typically last 6 – 8 weeks. Normally, we do this in our RV. I’ve
covered the Chicken Whisperer Tour a few times before: Florida
Bound 2014, CW Fall
Tour 2015, Chicken
Whisperer Fall Tour Complete, CW Tour
Update, and more…
This
time, things are a little different. About a month before the tour, my husband
threw out the idea that we might want to stay in hotels for this trip. I made
that face like, “You’ve GOT to be
crazy!” He ignored me and continued sharing his thoughts about how it would be
great on our gas mileage and since his events are back to back causing us to
have to stay in a different place every night after traveling 2 – 3 hours every
day to the next event, it might work better for us… this time.
I
am NOT a hotel person, especially with kids. First, the last few times we’ve
stayed in hotels it’s like moving a mountain of toys, snacks, books, shoes,
computer bags, diaper bags, homeschool materials, clothes, a radio for music we
listen to at bedtime, Lily’s eating chair, etc. You’re exhausted after rolling
the cart where the wheels are always flat to your room. Then, I feel like I have to keep them really
quiet the entire time we’re visiting, which is like asking someone to keep a
rooster from crowing all day long. It’s not possible without making them stew
meat. Not to mention, there’s just the stress of being somewhere that’s not
yours, night after night. Not your bed, not your shower, not your carpet, not
your light that you can dim in the bathroom, and not your kitchen… which leads
us into another issue. This trip is going to last 4 weeks round trip. Four
weeks of not having our own kitchen to cook our own food. I really wasn’t
looking forward to it, BUT my hubby
had a point, so I said I’d give it a try, but we had to do things different. We
made a plan on how to organize everything we were taking to keep things at a
minimum. This is how we did it…
How we pack for multiple hotel
stays
This
hotel stay was going to be different. We were not lugging everything including
the kitchen sink into the hotel room as we normally do. We were going to be
organized, so we came up with a plan.
Packing the truck
We
wanted to pack the truck to make things easily accessible when we needed them.
Here’s how we did it from the front to the back.
What we bring inside the car:

In
the seat between the kids, we always bring a toy bin of things the kids can play with. I have them choose their
own toys they want to play with on their trip before we leave. They can only
reach the toys on top, but it’s not too hard for me to turn around and hand
them what they need when they ask.
Behind
the toy bin is a red bag that holds some of our school materials including clipboards with blank white copy paper, workbooks,
coloring books, and construction paper.
In the floor…
In
front of Lily are 2 bags of snacks.
In
front of Caleb is another box of schooling
supplies.
What we bring inside the Camper
Top:

Closest to the tailgate (See the picture above from
Left to Right):
Box of shoes: We brought 3 pairs of shoes
each. In the box we have our tennis shoes for times we needed them, but this
box eventually made its way toward the back. We didn’t wear shorts often in the
northern climate, so we just stuck with the boots we wore each day. We kept our
sandals in a plastic bag in the hamper that we took into the hotel each day for
showering.
Cooler: We brought a few cool foods
that we would bring in with us to put in the fridge each night.
Computer Bag: This is my husband’s
computer bag and it went with us everywhere.
Hamper Basket: This worked like a suitcase
for us and went in the hotel each night. There were a few things that always stayed
inside it like the medicine bag, diaper bag, and AED. We often stacked the bath
bag and shower bag on top of it. Each time before entering the hotel, I would
pull out clothes to wear for the next day from the black drawers, which we
would talk about next.
Black Drawers: These drawers held all of
our clothes. Each person in the family had a drawer. Additional drawers held
swim suits, cold clothes gear (hats, scarves, & gloves), and pajamas.
Hanging Clothes: On the left are my husband’s
work clothes and on the right we hung our heavy jackets.

The next section shown above includes these items…
On
the left, is where my husband’s work box
started out. It soon ended up under the dirty clothes hamper on the right
because it was a frequently used item. We took it out at each of Andy’s events.
We also kept his stool with the event box, since it would come out each time.
We
brought a black bin that we filled
with water bottles at the beginning of our trip. It was a lot cheaper than
picking up a bottle of water at the gas station all the time.
Beyond
that on the left are boxes of extra
books, magazines, and pamphlets that we would use for Andy’s events over
time, but we didn’t need all of them every time. For each event, I would pull
out one box of each so I had them stacked with that in mind.
On
the right, you’ll see the filled gas can,
which we always carry with us on trips like this. You never know when you’ll be
traveling in the middle of nowhere and need gas, but none of the stations are
open.
Further
back, are tools that always stay in
the truck. Better to be prepared.
Once
we checked into the hotel, the right side of the bed next to the black drawers
was empty, so we brought Andy’s work stuff that he would need for his event
forward for easy access.
After
his events, we put all Andy’s work stuff back where they started and we’d
return to the hotel.
The
next morning everything we took into the hotel was returned to its place in the
truck, but all the dirty clothes would be placed in the dirty clothes bin and
would be replaced with new clothes for the next day.
Every
couple of days, we tried to reserve a hotel that offered coin laundry, but
occasionally we had to find a laundromat.
What do we take into the
hotel?

Not
the kitchen sink. I mentioned most of the items earlier in this post. Our list is
much more streamlined and efficient. We quickly figured out a Tetris method of
how to fit everything on the cart each time we roll it into the hotel.
What homeschool materials did
I chose to bring?
I minimalized
my homeschooling materials for this trip, not because I didn’t plan on working
with my kids, but because we didn’t have a lot of space. With what I know how,
I could have weeded out even more. Here’s a list of things we actually used…
Markers
Dry
erase markers
Eraser
Dry
erase board
Workbooks
Glue
Scissors
Clipboards
with blank copy paper
Smocks
Before
leaving, I found some worksheet resources I thought would benefit my kids on Teacherspayteachers.
They have a lot of great products for all price ranges, even FREE!
I
actually created a new product while on the road, so I used the business centers
at various hotels along the way to print out the pages as I completed them for
my kids to test out during schooling time. You can check out Veggie
Themed Basic Math Activities at The Learning Wagon Store!

How and where do we fit in
time to school?

We
were able to fit in a little homeschooling every day. I tried doing things at
various times during the day, but on event days, we had fun carschooling. After
getting Daddy all setup, we went back to the car got down to work. Sometimes,
we just sat in our seats and used our clipboards to practice writing our last
name, write numbers, or do basic addition. I used the dry erase board to
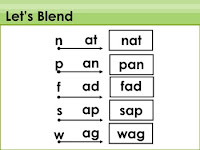
practice reading letters, blending, sight words, and sentences. Other times, we
had fun in the back of Daddy’s truck. With the hotel items dropped off and Daddy’s
work stuff out, we had some space to have some sensory play with kinetic sand
and play dough. When we had a day off, we homeschooled in the hotel or even
better, we roadschooled. We found some awesome places nearby to learn from. The
most memorable was seeing one of the Great Lakes, Lake Michigan. This was a
first for our whole family! We had a great time playing at the beach, but we
also enjoyed our trip to visit the De Zaan Windmill at Windmill Island
Gardens. It’s the only authentic Dutch windmill still working in the United
States! These were just a few of the great adventures we had traveling around from state to state.

I
hope you found this post helpful or at least interesting to see a different way
people live. In a future post, I'll be sharing some of our hotel traveling hacks! I hope you come back and join us!
Don't forget to follow our journey and be informed about new products as they enter my store by Following me on Facebook and Twitter!
God
Bless You on Your Learning Journey ~