Shaving
cream is one of those things teachers either love or hate. I tried it once in
my kindergarten classroom in a whole group lesson and learned my lesson not to
do that ever again! However, I didn’t give up on it… I tried it again in small
groups and it was much more manageable, but it’s not like it came out once a
week… or once a month even.
Now
that I’m homeschooling the shaving cream has come out of the cabinet a few
times this year. We’ve practice writing letters, our names, sight words, and
numbers. I’ve figured out a few tricks through the years that have made things
a little easier, which I’ll share with you later.
This
week is Thanksgiving week, so we’re taking a break from the routine and just
having fun so I gave the kids a choice…
Shaving Cream or Watercolor Paint
It
was a tough choice. They love both, but obviously, they chose Shaving Cream!
Since they love painting also and they didn’t choose that I thought maybe they
could combine both worlds by painting with shaving cream. They liked the idea,
so I pulled out the paint brushes and this is how we got started!
Painting with Shaving Cream:
Materials:
Shaving
Cream
Paint
brushes (any size will work, but small watercolor paint brushes work great)
Squeegee
or cut plastic square (I’ll share more about this later.)
Smock
Optional
Decorations: beads, cut pipe cleaner, cut straws, bells… the list goes on!
Tip
#1. Choose a good spot. Shaving cream
can get messy pretty fast, but it can be cleaned up pretty easy if you do it
right. I like to be near a sink or water source. You don’t want 10
five-year-olds walking down the hall with shaving cream covering their hands,
because that’s not the only place the shaving cream will be in the next 5
minutes.
Tip
# 2. Choose a smooth surface. You want clean up to be fast and easy to make
transitioning into the next activity fast. We have a plastic picnic table that
has a gritty surface. While it might be a fun sensory experience at some point,
in general the rough surface would make clean up difficult unless you could
just spray it off with a hose.
Tip
#3. Wear a smock to cover clothing. Even a large old t-shirt would help.
Tip
#4. Keep some wipes or paper towels nearby to do a quick wipe up of any shaving
cream that drips on clothing, the floor, or anywhere else it is not supposed to
be.
Tip
#5. Go through your behavior expectations before you spray the shaving cream on
the table. It’s important to mention rules like, “Do not clap while you have
shaving cream in your hands.” I even explain the WHY. “It might go in your eyes or your friends and it hurts. Even
still they might try it, so be prepared with wipes or a sink for eye washing.
Also, it’s important to let them know where the shaving cream is allowed to be
and where it is not. For multiple students painting in a general area, let them
know where each student’s personal painting area is. If they have a difficult
time understanding this concept, use painter’s tape to mark a square in front
of them.
Tip
#6. Squeegees work well to easily clean up shaving cream from a table, but
there have their cons. One drawback is their size and shape. Even the smallest
size is pretty big so whether you keeping just one or one for each student,
storing them could be a setback. Instead, I recommend using a cut plastic
square. How? you may ask… It’s
simple.
Take
a plastic folder and cut it into about 3 inch squares. These are great because
storage for even 30 would take up minimal space. They are cheap. One folder
would make enough for several students. Also, these work great as erasers.
Their small size makes them easy to have on hand for each student. Just show
the kids how to use the edge to scrape the table clean and the bend the plastic
square while smearing the cream back on the table in a pile. In addition, you
can also have them use the squares to spread the shaving cream evenly in front
of them.
Directions:
1.
Spray a pile of shaving cream in a central location. I typically choose the
middle of the table if students are sharing. As I learned during my first
experience, less is more with shaving cream. You can always add more.
2.
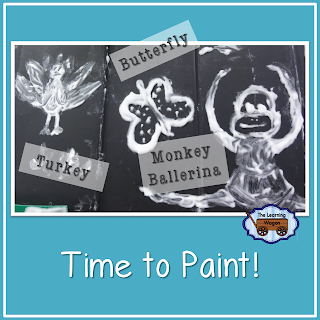
Provide the students with a paint brush that they can dip in the shaving cream
and then paint a chosen object or scene in front of them. They can also paint
words or numbers if you want to add academics back into this activity.
3.
When finished, have them use their “eraser” a.k.a. cut plastic square, to wipe
their area clean and begin again.
Even I joined in the fun...
Christmas
Activity:
We
had fun shaping the shaving cream into a triangular Christmas tree shape. Then,
decorated the tree with cut pipe cleaner as garland and a yellow star topper as
well as beads for ornaments. It would be fun to see what designs kids could
create. There are many shapes that would be fun to decorate in this fashion
from wreaths to snowmen.
Last
Thought… If you have some food die to change the color of the shaving cream, I
think it would even make this activity more interesting. We might try that next
time!
Do
you love this idea? Try it! I’d love to hear all about your learning experience
and share your pictures too!
God
Bless You on Your Learning Journey ~


No comments:
Post a Comment